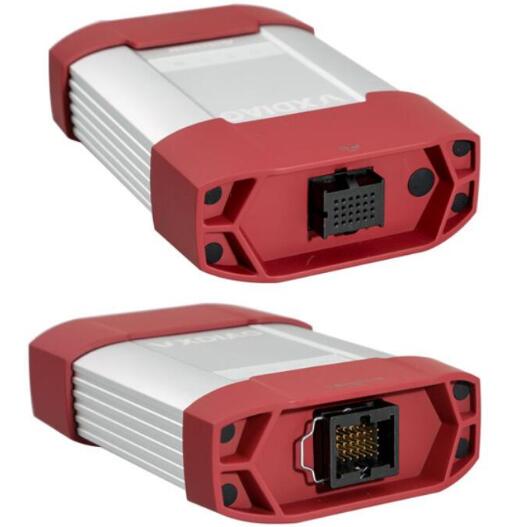
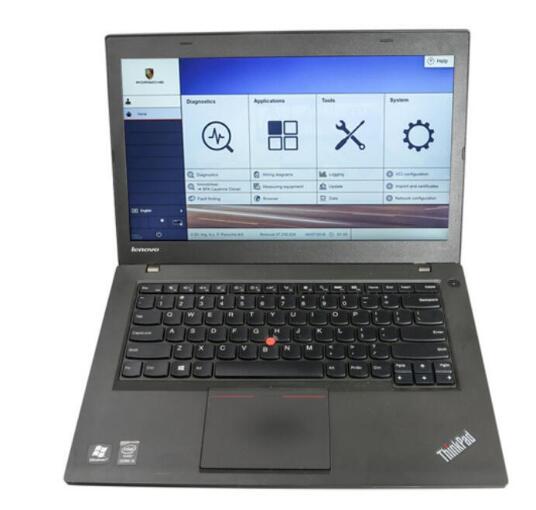
Allscanner VXDIAG Porsche Piwis III with Lenovo T440P Laptop Porsche Piwis tester III V37.250.020
NOTE: 1.Allscanner VXDIAG Porsche Piwis III has the same functions with Porsche Piwis 2.If you want to do online programming,you must have an account online.
VXDIAG Porsche Piwis III Functions & Features: 1.New operation system and more intuitive diagnostic interface 2.New VCI for post-2018 vehicles with DoIP diagnosis 3.Good at maintenance, repair, control units change and programming & setting codes 4.To login for online immobilizer programming 5.To find out leading faults 6.To look for maintenance wiring diagram 7.To support special functions like modification or flashing, with Engineering mode (Development version)
VXDIAG Porsche Piwis III New & Old Cars: All Porsche from 1998-2018: Porsche 911(997) (991) Boxster/Cayman (987) Cayenne up to MY 2010 Cayenne from MY 2011 Panamera
especially the latest models: Paramera (971) 2018 Caynenne (92A) 2018 Macan (95B) 2018 911 (991) 2018 and other old models
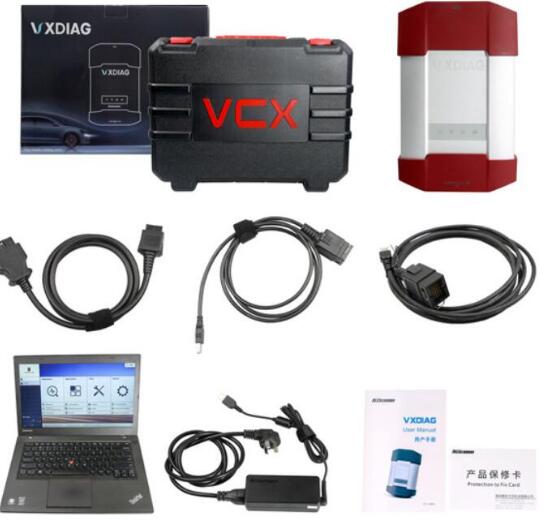
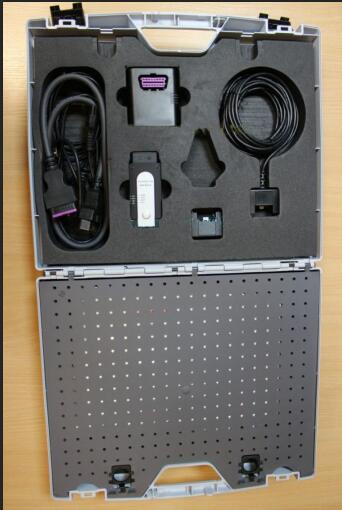
Package includes: 1pc x Piwis tester III VCI 1pc x USB Cable 1pc x OBD Cable 1pc x Lenovo T440P Laptop(second hand) 1pc x Lan cable
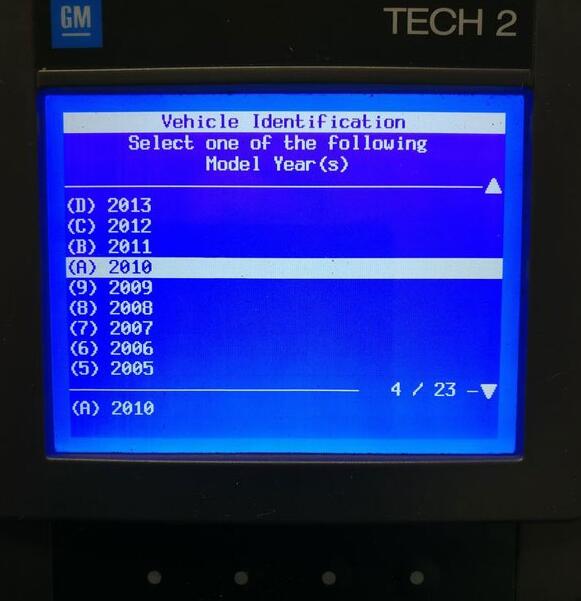
Why my Hummer is not shown in the GM vehicle list? That little short list is incorrect and only shows a few of the earlier than 2007 CAN bus vehicles.
Tech 2 clone for both troubleshooting and programming Hummer? I’ve used my Tech2 on my 08 many times for troubleshooting not programming But I think it should be able to program Hummer.
Anyone has good success of Hummer H3? My H3 has had a CEL on – po452. I checked it with the tech 2. Well it pulls 3 codes, po455 (large evap leak), po442 (small evap leak), and po449 (vent solenoid control).
Tech 2 is possible to program for Hummer H2 above the year 2007… what to do in that case?
Actually it does the programming just fine on newer than 2007 GM vehicles BUT you must pay for an ACDelco TDS subscription for vehicles above 2007 and you would use the CANDI module that comes with many of the Tech2’s for working with CAN bus vehicles. You can subscribe for it. This is ONLY needed if you want to program or update the software in a module. ALL of the build in diagnostics and testing for vehicles up to 2013 works without the subscription or the older TIS2000 software. You only need those for doing actual programming. The older TIS2000 software – that is what has the programming was discontinued in 2007. TIS2000 does have the actual programming for all vehicles up to 2007. After 2007 GM went to the TDS system. You can also get a newer style MDI or MDI 2 for diagnostics and programming. The catch with those. They have NO screen or built in software and you must pay for a subscription from from ACDelco TDS to use an MDI. Other brand units, a very select few can do actual programming and use the pass-through method. NONE have the diagnostics that the actual Tech2 scanner or GM MDI Scan Tool (with the subscription) will have. Check with Autel and see if they have the full diagnostics and re-calibration for the rear air suspension on a Hummer H2. Not going to happen, there is too little demand for them to hack and reverse engineer that particular bit of code in a Tech2 to figure out the diagnostics and then write programming for that for their tool.
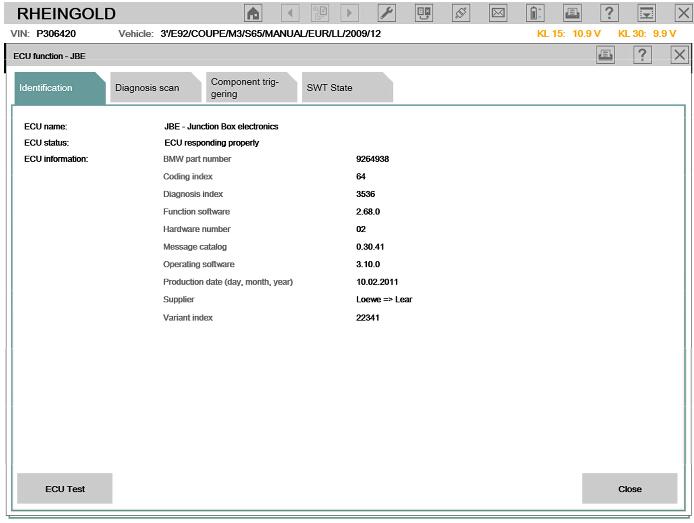
Lan Connect Operation Details 1. Connect the LAN cable to ICOM A1/ICOM A2, another side to laptop LAN port 2. Connect OBDII cable to car OBDII Port; sometimes you might need the external OBDII cable. 3. Insert the USB KEY to laptop USB Port and power on the laptop 4. Input the password: BMW ICOM (all Capital letters) and press “Enter” to continue. 5. Wait the software well loaded (The red letters disappear and the offline day appears)
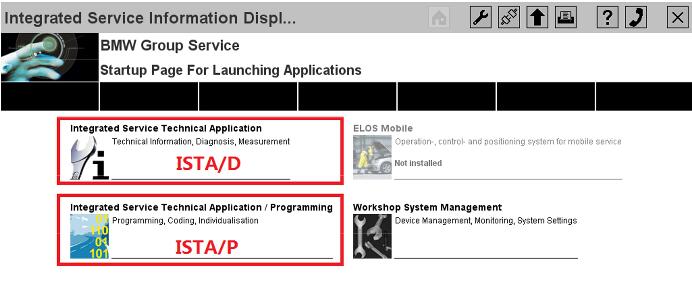
6. Choose ISTA/D or ISTA/P to enter the diagnostic or programming software. 7. For ISTA/D Choose [Vehicle identification] and choose read out vehicle data or start vehicle test to diagnostic with cars.
8. For ISTA/P choose [Create new session], then choose the free icom, it will read out all the vehicle’s information and modules one by one.
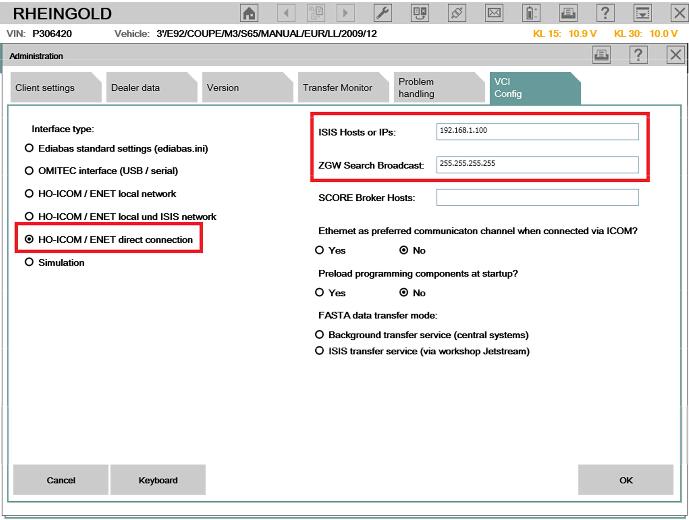
Wireless Connection Details 1. Power on the router firstly, till the green LED is flashing on the router. (Important) 2. Connect the ICOM A1/ A2 to car OBDII port via the OBDII cable and make the ignition on. 3. Wait till the ICOM A1/ A2 WLAN LED is light up and flashing (around 10 seconds or so) 4. Insert the USB KEY to laptop USB Port and power on the laptop 5. Input the password: BMW ICOM (all Capital letters) and press “Enter” to continue. 6. Wait the software well loaded (The red letters disappear and the offline day appears) 7. Choose ISTA/D or ISTA/P to enter the diagnostic or programming software. 8. For ISTA/D Choose firstly, then choose [VCI Config], check the IP address like this: 192.168.1.100 / 255.255.255.255 9. The interface type must choose [HO-ICOM/ENET direct connection], click save and close the window.
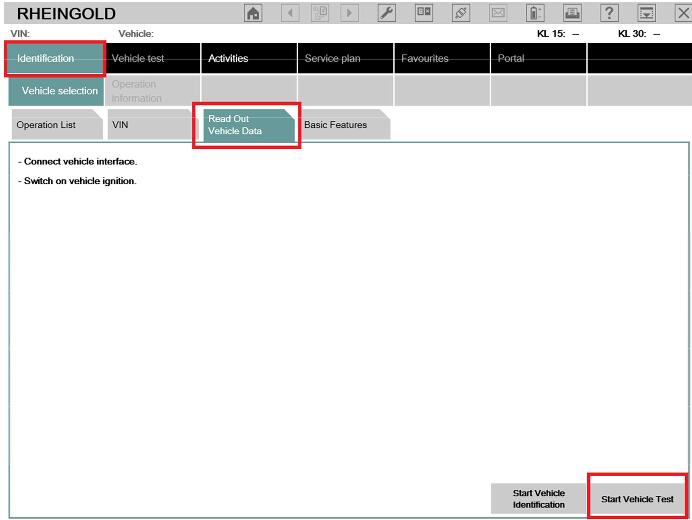
10. Choose [Identification] then choose [Read Out Vehicle data], then choose [Start Vehicle Test].
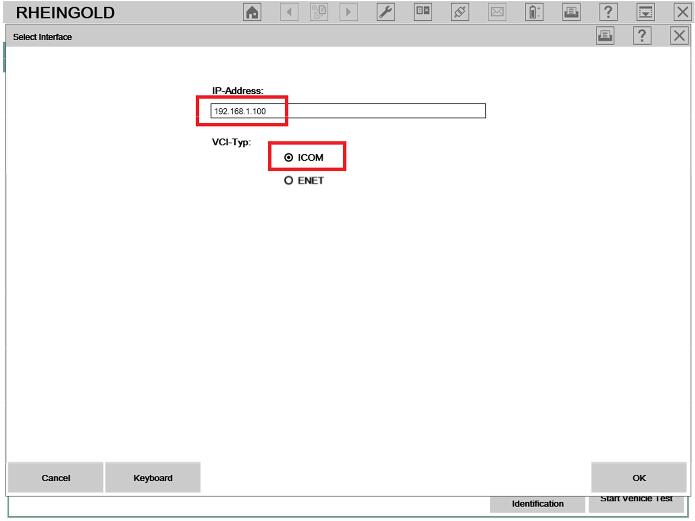
11. At the popup screen, please confirm the IP address is [192.168.1.100] and choose [ICOM], and then system will read out all the car information and modules one by one.
NOTICE: 1. All the internal settings are well configured, please DO NOT change settings, this might lead the software not working. 2. Switch between LAN and WLAN, you need plug off the OBDII cable from car and re-plug in (Make the ICOM A1/A2 multiplexer restart) 3. Please keep your laptop/ Routers with stable power when using. 4. If you cannot diagnostic with cars by WLAN, please make sure the router is powered on and restart the laptop to try. 5. All operations must base on the software well loaded! (red letter disappear and offline day appear)
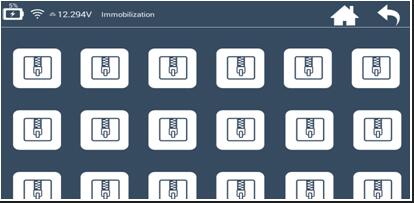
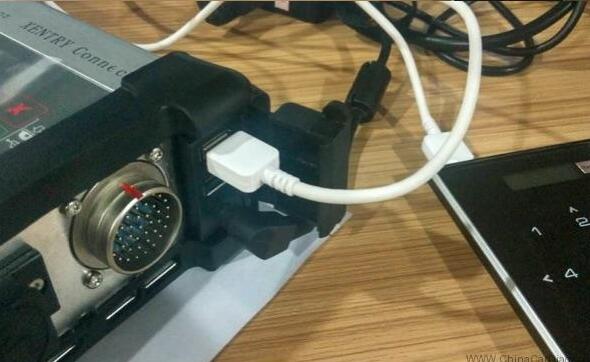
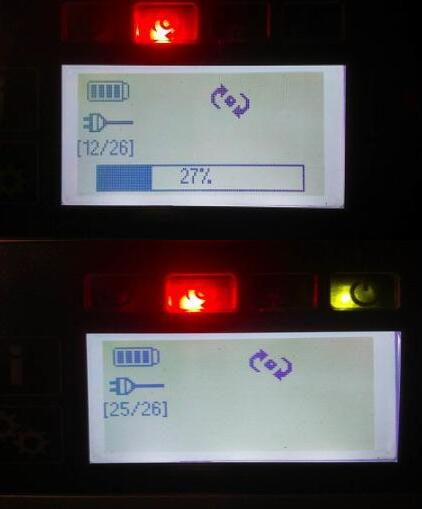
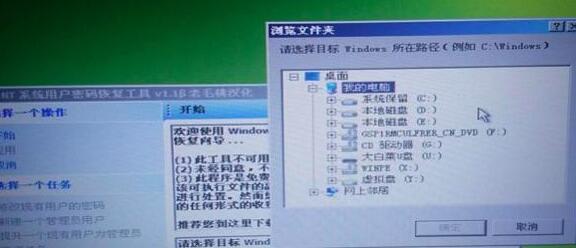
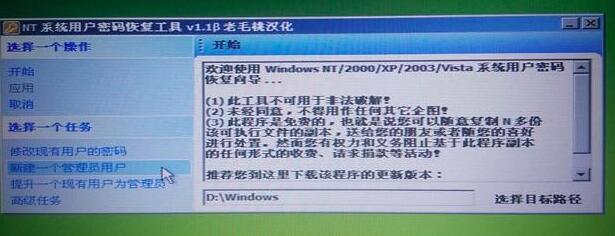
Problem: Click “Immobilizer” button after updating the device, it skips to below interface:
Solution:
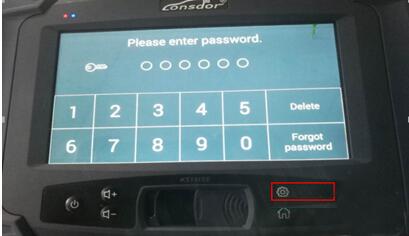
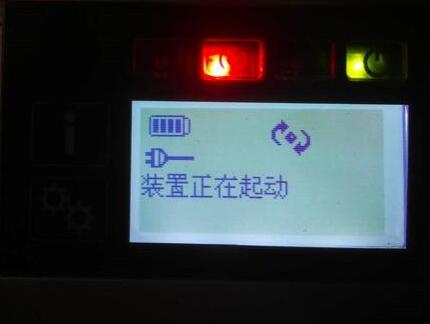
Step 1: After rebooting the device, please press and hold the setting and return buttons(in below red box) simultaneously for few seconds..
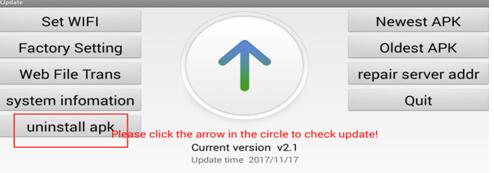
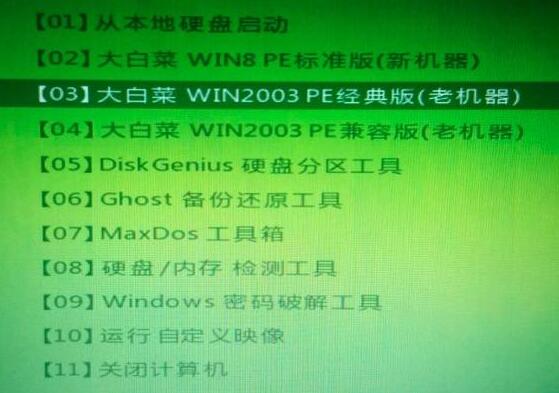
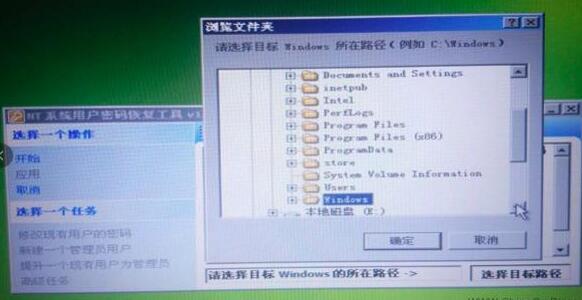
Step 2: The following interface appears, please click “uninstall APK” button in the red box, and wait for few seconds.
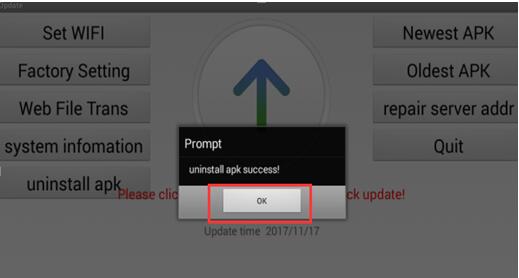
Step 3: It skips to below interface, please click “OK” to continue.
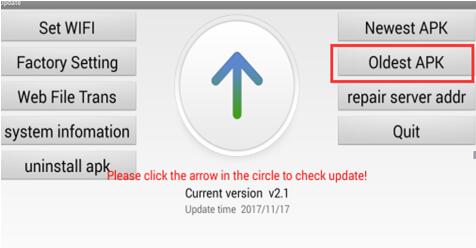
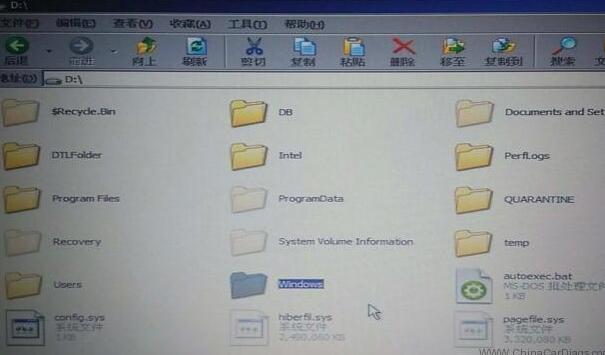
Step 4: The following interface appears, please click the button in the red box to install factory-set/default APK.
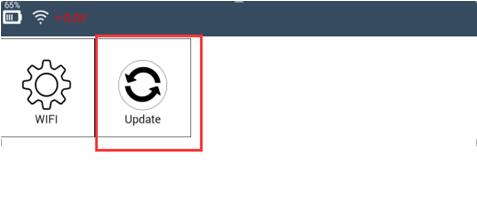
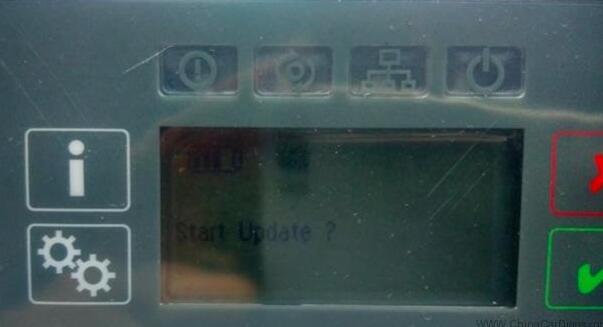
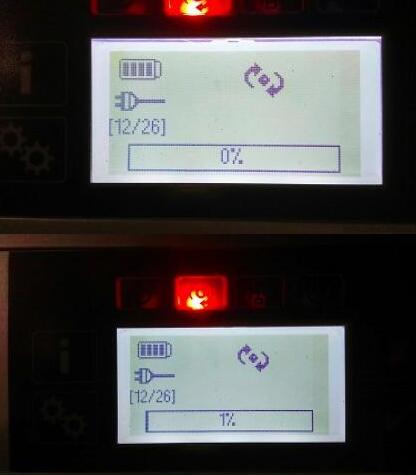
Step 5: Please wait for about half a minute. The factory-set APK is installed and initiates automatically. Then input the password on boot, and click “OK”. It skips to below interface, click “update” in the red box. Remember to reboot the Lonsdor K518 Auto Key Programmer after updating. You can use it normally now.
This is how to set up Router or DHCP server for BMW KOMBI and NBT programming with Enet e sys cable or ICOM A2 Ista-p.
Why LAN cable connection better than WLAN from rounter to PC:
Because ista P does not support wlan connections. Probably due to stability liability.
Ista p does not support wifi (wlan) and will not start ista p server if the wifi is enabled on the laptop, only ista p client will open and you cannot select istap server to program. Imagine if the wifi connection drops during programming then the car is screwed up. There are good reasons why bmw doesn’t allow programming via wifi
How to use the Router programming:
ICOM and computer must be connected through a router with DHCP server enabled. no direct connection laptop -> icom.
But you don’t have to use a router. But you do need a DHCP server running on the laptop on the ethernet interface.
It’s pretty easy,
1) Set a static IP on the Ethernet (not wireless) interface – I use 192.168.254.1 2) Install DHCP server (http://www.dhcpserver.de) 3) Configure DHCP server to listen on the Ethernet interface 4) Click on the buttons to set firewall ports and run as service 5) Connect up your ICOM Scanner and it’ll get a DHCP address from the DHCP server
Then you can program everything without faults.
I use this on multiple ISPI laptops and never had an issue and never needed a router to connect the computer and ICOM to.
This is a customer share of configuration that worked flawless:
Router DHCP, Icom DHCP and Windows Ethernet: automatic dhcp First of all the ICOM A2 should be configured this way:
“Use the following IP Address” IP 192.168.68.99 Subnet mask 255.255.255.0
BMW ICOM or ENET cable: which better for flash
There are problems with both ICOM and ENET. ENET can’t flash all ZGW modules and ICOM can’t flash any NBT units (including all other control units in MOST bus like KOMBI, AMP and so on). Fix is the same for both, use DHCP server to assign IP adresses. With ENET you can flash NBT even without DHCP server and with ICOM you can flash ZGW without DHCP server. You can even flash whole car without DHCP server by first flashing the ZGW with ICOM and then flashing the rest with ENET.
I meant that ENET is no worse than ICOM, and very very likely original ICOM is no worse than ENET. Anyway the difference is academic. Chinese cloned ICOM’s can be worse than ENET. New original ICOM Next costs around 510 euros, I think that there is no different between it and ENET in reliability. I don’t even remember when I last time used ICOM for F-series flashing, it was over a year ago anyway.
KOMBI and NBT programming review:
I flashed several F10,F20 with 3.56.4 and ICOM A2 through dhcp and its working well. MOST connection will be used in Exx series, i flashed also some R56 and many E91 with most connection.
Just add a router and connect the icom to it and offcourse your laptop to the router. Open a browser and type: ip address of your icom:60080 (User name: root Password: NZY11502) and change lan setting to dhcp. Reboot icom and check with iToolRader the new ip address of your icom. It should be 192.168.x.x Fire up ista-p and do your coding.
How to install Ford IDS 109: 1- Install the ids 86 before changing the date to 1 07 2015 (hold the date 1/7/2015 , until you finish step 5 every time you restart your computer, check the date, if it is on 1/7/2015) 2- install patch ( choice option 2 ) 3- Make a backup of your windows system (I recommend, this is optional) 4- Open the program with the interface connected ,,( choose NON DEALER,when open program for first time ) , keep vcm turn on,on the computer. 5 – create a restore point,,,then turn off vcm of the computer 6 – Okay, now install the new version, v109.01, before installing, changing the date of your computer, to the current day 7- After installing, go back to the restore point, which you created in step 5, activate this restore point, and then open the program 8- Finally, install FordExtendProgram (click right mouse button click on, run as administrator)
Done, will work in the new version
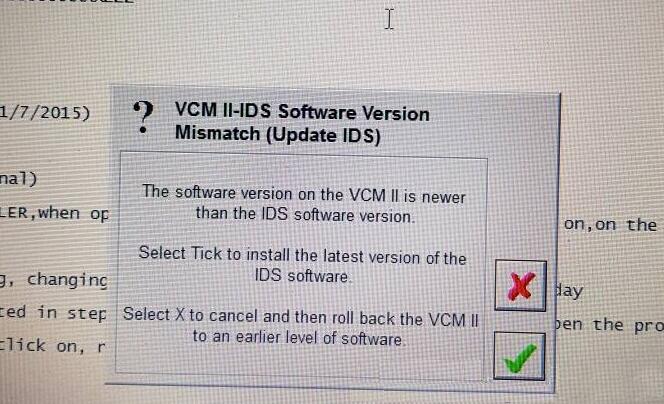
Ps. here’s solution of “VCM II-IDS software version mismatch (update IDS) ”
Click green Tick box to update firmware. If it does nothing, <=Perform VCMii reset . Unplug USB cable from end Ford VCM II take off black rubber end boot plug back in USB restart IDS hold BUTTON middle end VCM plug in to PC all lights flash and and when VCM beeps release button IDS will prompt VCM update to IDS level press Tick
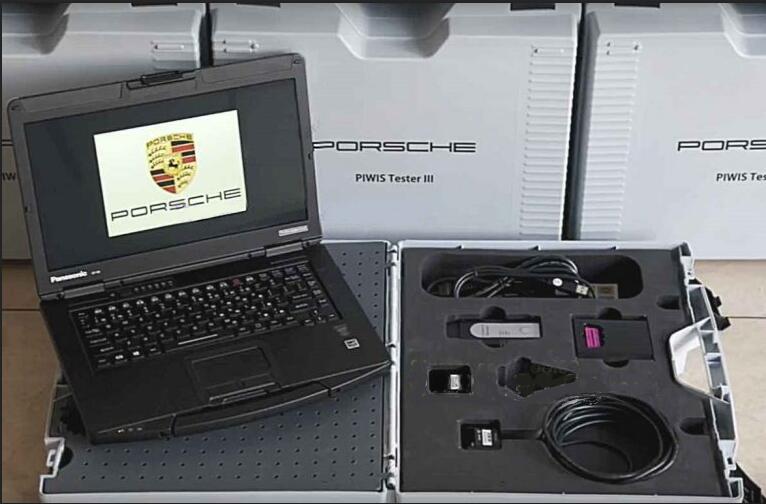
Porsche Piwis tester 3 PT3G VCI with V37.250.020 Piwis 3 Software unlimited license installed on Full new Panasonic CF-54 laptop ready to use new release for Piwis III diagnostics and with Porsche PPN subscription for Porsche Online programming. What’s the Feature of Piwis III? Why Choose Piwis 3 with V37.250.020 Porsche Piwis Tester III software? Obd2tool.com share PIWIS tester III PT3G VCI Feature as following.
Porsche PIWIS Tester III With V37.250.020 Piwis 3 software Installed Full New PANASONIC CF54 Laptop Ready To Use
PIWIS 3 Porsche VCI3 Porsche PIWIS Tester III with Panasonic CF 54 Porsche PIWIS III with V37.250.020 Piwis 3 Software Update New Feature
Piwis 3 compare with Porsche Piwis II, more faster and stable connection Simulation mode (diagnostic session without VCI connection)
Porsche Tester III more convenient for working:
Porsche Piwis Tester 3 Wired USB connection compare with Porsche Piwis II, Piwis 3 tiny size support wifi connection as advantages for workshop using
Support More New Car Model:
Porsche Piwis 3 PT3G VCI compare with Piwis II work for new model: Panamera G2, Cayenne E3, and Porsche cars after 2017 till 2018. Obd2tool.com have Porsche Piwis III PT3G VCI with V37.250.020 Porsche Piwis 3 software Features unlimited license.
Porsche PIWIS Tester III Software Unlimited License:
V37.250.020 Porsche Piwis Tester III software with unlimited license, work all the times, Professional Diagnostic Tool Porsche piwis tester III End-user capable DVD update
PIWIS Tester III VCI Cover full Piwis II functions:
Porsche Piwis Tester III work for Diagnostics, General ECU diagnostics (DTC read/clear), ECU programming/coding, Real-time control parameters display & Electrical schematics mapping etc.
——Fault finding Guided
——Immobilizer-DPA Cayenne Diesel
——Wiring Diagrams
…
PIWIS 3 Porsche VCI3 Porsche PIWIS Tester III with Panasonic CF 54 Porsche PIWIS III with V37.250.020 Piwis 3 Software Update New Feature
Piwis 3 from obd2tool.com is the third-generation Porsche diagnostic tool Porsche Piwis Tester III, it’s improve to the modern user interface, easy to carry for working, faster performance.
Porsche Piwis III Update New: license automatic update, online view of the technical documents, fault finding guide, online programming, faster and more efficient work.
Need Original Porsche Piwis III with V37.250.020 Piwis 3 Software Unlimited License just contact us freely.
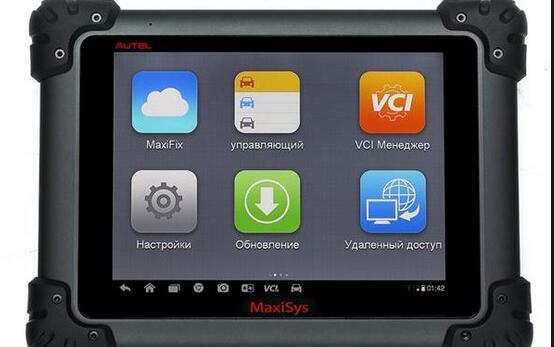
The Autel Maxisys Pro Diagnostic Platform is an evolutionary smart solution for specialized automotive diagnosis and ECU programming. Designed with the DNA of Autel’s diagnostics family, the MaxiSys is built to offer many of the prestigious qualities of the MaxiDAS DS708 with extreme ease of use and powerful diagnostic performance. However the MaxiSys has evolved far beyond the original capabilities. Utilizing an A9 quad-core 1.40GHz processor that offers 50% increase in speed versus competing products, a 9.7” LED screen with a resolution of 1,024 x 768 capacitive touch screen, the revolutionary multitask-capable Android Operating System, combined with the best possible coverage of OE-level diagnostics, the MaxiSys is the perfect diagnostic solution for shops and technicians who demand unrivalled smart technology and smart repairs.
1. Extensive vehicle coverage for more than 80 US, Asian and European vehicle makes 2. Easy and intuitive navigation makes finding what you need simple and fast 3. Open source Android Operating System for fast boot-up and multitasking 4. Displays live data in text, graph, analog and digital gauge for easy data review and analysis 5. Configures display options, sets triggers, records and playbacks results with one touch 6. Cloud-based Data Manager saves customer and vehicle records, scanner data and technician notes
1-Added new transponder MEGAMOS AES 2-Toyota key maker: new menu item AUTODETECT 3-Key maker Kia Sportage 2008- (MPC5xx,HITAG) 4-Key maker Hyundai Sorento 2008- (MPC5xx,HITAG) 5-Key maker Renault Fluence III 2012- (NEC850,HITAG)* 6-Key maker Renault Megane III 2012- (NEC850,HITAG)* 7-Fixed some bugs, incl. PCF7930-35 recognition
How to find VAG CS 7th Byte in Tango?
requires Tango software version 1.112
Component Security in keys of the Megamos48 type The modern immobilizers of the VAG-group vehicles have such conception as “Component Security” (CS). The CS is an array of 7 bytes length. Its role in a vehicle is to forbid a mixing of electronic units from different cars. In terms of the immobilizer the CS is a “password” that used in couple of the Motor Unit (ECU) and the immobilizer. The protection scheme includes 3 components that share the CS, they are: ECU IMMO KEY The protection scheme allows the engine to start only in case when the CS is identical in all the three components. Key and CS The CS is a part of the Crypto Key and fills its upper area Word9-Word6.
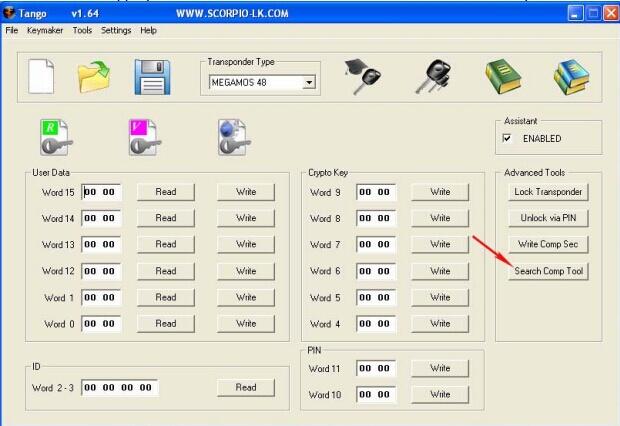
Usage In common practice it is possible to get the first 6 bytes of CS. The last, 7th byte is unknown. There are many ways how to find out the 7th byte. One of them is to pull out it from an existing key. Thus, to use this tool, it is needed to have at least one valid key. 1. Running of the “Search Component Tool” Click the appropriate button in the MEGAMOS-48 mode as shown on the picture:
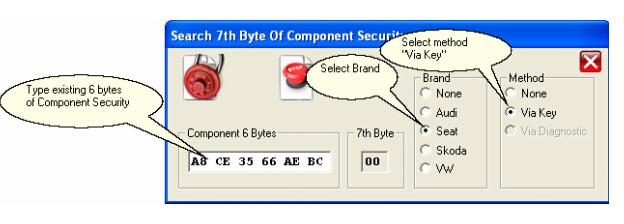
2. In the new window: Type the 6 bytes of CS that are known Select Brand Select method
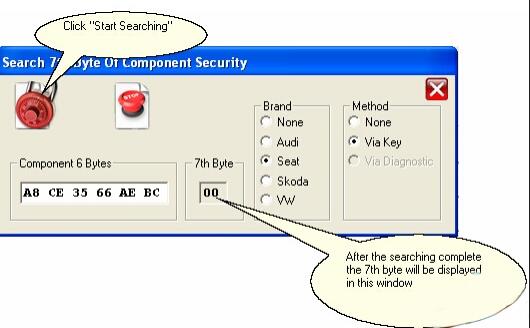
At this example the CS assumed as A8CE3566AEBC and a car is Seat. 3. Now all is ready to start searching. Put the valid existing key into the programmer coil. Click the “Start Searching” button:
During operation the 7th Byte value will change sequently from 0x00 to 0xFF. When the value is valid, the process will be stopped. Operation takes up to 1 min of time.
Key and CS The CS is a part of the Crypto Key and fills its upper area Word9-Word6. ECU and CS ECU uses the CS as a password. More modern ECUs contain only 6 bytes of the CS. In this case the CS should be extracted from another devices, for example it may be a dashboard. IMMO and CS The vehicle dashboard usually has a role of an immobilizer. The IMMO always contains all the 7 bytes of the CS.
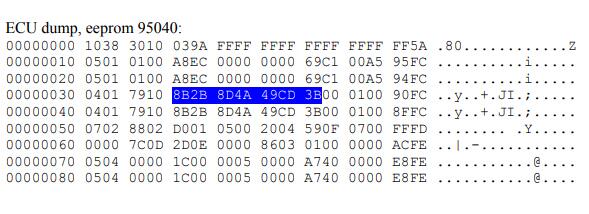
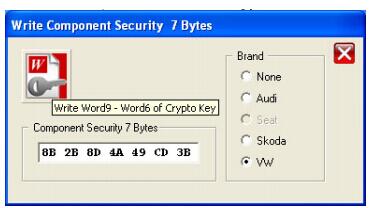
Introduction The tool “Write Component Security 7 Bytes” (Megamos 48 window) helps you to put the CS manually into a transponder. Let’s see an example of ECU BOSCH Motronic M7.
The CS has been marked in the blue color. To write the CS, invoke the tool and type the CS in the window:
Select the vehicle brand and press the Write button. Temporary the Seat brand is unavailable