نوشته شده توسط : lily

Question: Can Launch X431 V+ connect to any printer to print data?

Answer: No, but only connect to Launch Wifi printer, The diagnosis report can also be shared to the mailbox for printing without connecting to Launch WIFI printer.

To print the diagnostic report from X431 V+, please firstly install the Launch Wireless Printer.

Meanwhile, the procedure applies to Launch X431 V /X431 PRO/ PRO3/ PAD2.

Firstly, you have to set up a printer plugin for the first time you use it, it should prompt you to install the correct one, be sure that you’ve selected correct printer and click the print icon.

Step 1. Because Android devices don’t come with “drivers” built into the tablet, so please download the wireless printers’ specific app from either “google play store” or the printer manufacturer’s website.

How-to-Print-Data-with-Launch-X431-V+-1

Step 2. Setup the wireless printer app onto the X431 tablet and operate by following the prompts.

How-to-Print-Data-with-Launch-X431-V+-2

Step 3. Configure the installed app to your wireless printer.

How-to-Print-Data-with-Launch-X431-V+-3

Step 4. Via the APP, you can “share” images, screenshots and X431 diagnostic reports to your own wireless printer.

Step 5. To access this menu press the “share” icon and then select your printer app.

How-to-Print-Data-with-Launch-X431-V+-4

How to save & print A4 reports on Launch X431 V+?

After completing the health report for this vehicle, you can click on “Report” at bottom and enter the relevant information, then click on “ok” and it will give me a PDF version.

How-to-Print-Data-with-Launch-X431-V+-5
How-to-Print-Data-with-Launch-X431-V+-6

Select “Save as PDF”.

How-to-Print-Data-with-Launch-X431-V+-7

Exit the launch software, please ensure the Adobe Reader was installed, open reader and find the file, after it loads , go to the menu at the top right corner and click on “Print”.

How-to-Print-Data-with-Launch-X431-V+-8
How-to-Print-Data-with-Launch-X431-V+-9

Job is done!

How-to-Print-Data-with-Launch-X431-V+-10


:: بازدید از این مطلب : 365
|
امتیاز مطلب : 7
|
تعداد امتیازدهندگان : 3
|
مجموع امتیاز : 3
تاریخ انتشار : سه شنبه 16 شهريور 1400 | نظرات ()
نوشته شده توسط : lily

Have Audi Q5 2009-2012 with All Key Lost to program, used Autel MaxiIM IM608 pro with XP400 Pro (make sure the you also connect your XP400 Pro and MaxiFlash Pro J2534 connected to the car). The key learning procedure is to read IMMO data, make dealer key, key adaption to vehicle, test if the key can work.

Car information:

Car model and year: Audi Q5 2009-2012

Part # 8T0959754A

FCC ID: IYZFBSB802

Slot Key without comfort access

Claim:

Okay batteries that a vehicle please program your own risk I am not responsible or reliable for any mistake that you make.

Procedure:

Alright, as you guys can see I have a MaxiFlash J2534 connected to my OBD2 port,

and then I have my APC cable connected from my MaxiFlash to my Autel IM608 Pro tablet, make sure that you also connect your XP400 Pro, because we’re going to make a dealer key.
Audi-Q5-All-Key-Lost-Programming-done-by-Autel-IM608-PRO-1
Audi-Q5-All-Key-Lost-Programming-done-by-Autel-IM608-PRO-2

So this car has a dead battery, so we connected our jumper to the front by the windshield wipers there’s a little door, little hatch, you can open it has a little plus sign on it connect your positive cable by the strum there’s a negative cable.

Okay so first thing we gotta do you guys go ahead and turn on those emergency lights.

Okay make sure that is on.

Now let’s go ahead go “IMMO”.

Audi-Q5-All-Key-Lost-Programming-done-by-Autel-IM608-PRO-3

Scroll down to select Audi.

Audi-Q5-All-Key-Lost-Programming-done-by-Autel-IM608-PRO-4

Now the first thing we’re gonna do is go into “smart selection”.

Audi-Q5-All-Key-Lost-Programming-done-by-Autel-IM608-PRO-5

We’re gonna go ahead and input VIN manually, we cannot read the vin guys, so we’re gonna go ahead and put it manually.

Audi-Q5-All-Key-Lost-Programming-done-by-Autel-IM608-PRO-6

Alright, so after you have enter your vin you’re going to see the vehicle information make sure that matches up and press yes.

Audi-Q5-All-Key-Lost-Programming-done-by-Autel-IM608-PRO-7

Now, basically you guys, “key learning ” function will first clear all working keys, then learn keys available. “Remote Control Learning” function will first clear all working remotes, then learn remotes available. Before using these functions, please ensure that all keys are prepared.

OK guys, we press OK.

Audi-Q5-All-Key-Lost-Programming-done-by-Autel-IM608-PRO-8

So now to establish vehicle communication.

Right now asking is the currently inserted key a dear key /a locked key / a learned key, so just make sure it says no.

Audi-Q5-All-Key-Lost-Programming-done-by-Autel-IM608-PRO-9

So let’s go back, we’re gonna go to “key learning“.

Audi-Q5-All-Key-Lost-Programming-done-by-Autel-IM608-PRO-10

The first thing I’m gonna do is gonna read IMMO data.

Audi-Q5-All-Key-Lost-Programming-done-by-Autel-IM608-PRO-11

I’m gonna give us a sign a law that says the generous BCM, the BCM is usually located in the trunk of the vehicle, so go ahead open the door on the right hand side there’s going to be a little trapdoor, go ahead open that up there’s gonna be a little black box inside that says bcm.

so as soon as you see that sign or the notice that says the generous bcm you’re gonna go ahead and unplug the cable from the bcm.

Okay, as you can see, please generalize bcm and plug the cables, you’re going to come back press OK.

Audi-Q5-All-Key-Lost-Programming-done-by-Autel-IM608-PRO-12

Then I’m going to tell you to power on bcm, so they’re going to go back to the bcm, we’re going to connect everything up and press OK again.

Audi-Q5-All-Key-Lost-Programming-done-by-Autel-IM608-PRO-13
Audi-Q5-All-Key-Lost-Programming-done-by-Autel-IM608-PRO-14

Alright guys, so after you power on the bcm, we’re gonna go ahead and finish reading IMMO data as you can see, it’s almost done, it’s almost finished.

Audi-Q5-All-Key-Lost-Programming-done-by-Autel-IM608-PRO-15

And then we’re gonna go ahead and make a dealer key alright guys after we’re done reading the IMMO data, our next step would be to make a dealer key, it’s going to ask us if we need to make a dealer key, we’re going to press yes.

And then please put a blank key in the XP400 Pro programmer keyhole and then press [OK].

Audi-Q5-All-Key-Lost-Programming-done-by-Autel-IM608-PRO-16
Audi-Q5-All-Key-Lost-Programming-done-by-Autel-IM608-PRO-17

Sort of finishing up that dealer key, if you have another key that you want to generate, go ahead and put it inside the xp 400 Pro slot and press yes.

Audi-Q5-All-Key-Lost-Programming-done-by-Autel-IM608-PRO-18

The next step would be to do the “key adaptation to vehicle” what we’re gonna do is go ahead and put the key inside the ignition.

It’s going to ask how many keys we want to put into, press one.

We only have one key to do so we’re going to press OK.

Audi-Q5-All-Key-Lost-Programming-done-by-Autel-IM608-PRO-19

So it’s telling us right now that if the vehicles a transponder and put in sequence the keys that need to be learned, so we’re gonna go ahead and put the first key and press OK.

Audi-Q5-All-Key-Lost-Programming-done-by-Autel-IM608-PRO-20

We successfully program the key to the Audi.

Audi-Q5-All-Key-Lost-Programming-done-by-Autel-IM608-PRO-21
Audi-Q5-All-Key-Lost-Programming-done-by-Autel-IM608-PRO-22

So we’re gonna go ahead and turn off the emergency lights, you can see the currently inserted key a dear key /a locked key / a learned key, all are yes.

Audi-Q5-All-Key-Lost-Programming-done-by-Autel-IM608-PRO-23

We’re gonna go ahead and check our key, make sure that we successfully programmed it, although the car does have a low battery, so it’s not going to start, but you will hear trying to crank up, we’re gonna go ahead and test our mode make sure it works.

Audi-Q5-All-Key-Lost-Programming-done-by-Autel-IM608-PRO-24
Audi-Q5-All-Key-Lost-Programming-done-by-Autel-IM608-PRO-25

Hope it helps!


:: برچسب‌ها: Autel IM608 PRO ,
:: بازدید از این مطلب : 326
|
امتیاز مطلب : 9
|
تعداد امتیازدهندگان : 4
|
مجموع امتیاز : 4
تاریخ انتشار : سه شنبه 16 شهريور 1400 | نظرات ()
نوشته شده توسط : lily

ISID ISTA Diagnosis Connection Manual

1.ICOM Next A connect;

ISID-ISTA-Diagnosis-Connection-Manual-1

ICOM A2 connect

ISID-ISTA-Diagnosis-Connection-Manual-2

ICOM A connect

ISID-ISTA-Diagnosis-Connection-Manual-3

2. ENET Cable connect

ISID-ISTA-Diagnosis-Connection-Manual-4

3.Open BMW ISTA software

ISID-ISTA-Diagnosis-Connection-Manual-5

4.Operations-New-Read out Vehicle Data

ISID-ISTA-Diagnosis-Connection-Manual-6

5.select icom or ENET interface;

ISID-ISTA-Diagnosis-Connection-Manual-7

6.Read ecu.

ISID-ISTA-Diagnosis-Connection-Manual-8
If you want to know more about BMW ICOM, please visit our website:https://www.obd2tool.com


:: برچسب‌ها: bmw icom ,
:: بازدید از این مطلب : 327
|
امتیاز مطلب : 3
|
تعداد امتیازدهندگان : 2
|
مجموع امتیاز : 2
تاریخ انتشار : پنج شنبه 7 مرداد 1400 | نظرات ()
نوشته شده توسط : lily

1.Open the dealer website to download the SDD software;

(Computer system : windows 7 sp1 32bit,Applicable to car diagnosis before 2017)

How-to-install-Land-Rover-Jaguar-SDD-1

2.Install in sequence according to the software version number, and each software installation package is complete and prompts you to restart the PC;

How-to-install-Land-Rover-Jaguar-SDD-2

3.After the installation is complete, use the Land Rover DA/VCI diagnostic interface to connect to the vehicle;

How-to-install-Land-Rover-Jaguar-SDD-3
How-to-install-Land-Rover-Jaguar-SDD-4
How-to-install-Land-Rover-Jaguar-SDD-5

4.Read ecu;

How-to-install-Land-Rover-Jaguar-SDD-6

5.Read car information and faults;

How-to-install-Land-Rover-Jaguar-SDD-7

6.Land Rover diagnostic interface and diagnostic software applicable to it;

How-to-install-Land-Rover-Jaguar-SDD-8

https://jlrvci.blogspot.com


:: بازدید از این مطلب : 355
|
امتیاز مطلب : 8
|
تعداد امتیازدهندگان : 3
|
مجموع امتیاز : 3
تاریخ انتشار : پنج شنبه 7 مرداد 1400 | نظرات ()
نوشته شده توسط : lily


This guide of where to donwload GM Tech2 TIS2000 software and how to install it.Free version all from Customer support,Big thanks!

GM-Tech2

TIS2000 free Software

http://www.mediafire.com/file/bc92by7ao7fp1la/GM+2000NAO.7z
Tis2000 Dongle Crack

http://rg.to/file/a081c4c028aa1fb80ea98e15a540b9a9/TIS2000_Dongle_Crack.7z.html

Tested version:

How to install TIS2000 software:

Customer solutions.. here you go…try on your own risk

TIS2000 Window XP:

*   Installed a fresh copy of Windows XP SP3. I didn’t bother with updating anything else as far as security updates to Windows or install a virus scan because this computer will never be connected to the Internet or used for anything else.2. Installed ALL the required drivers until there were no more yellow check marks in Device Manager. I failed to do this at first and caused a lot of headaches later, including a BSOD during software installation.3. If you’re using a USB to serial adapter, plug it in now and set it up. Go into Device Manager and make note of the COM port used by the adapter.3. Install the Tis2000 software from the CD included with the Tech2. During the install, it will ask you to specify the COM port. If you have a serial port on the computer, it’s probably COM 1 or use the one from the USB adapter.4. Before you can use Tis2000 with your Tech2, you have to make it “think” that there is a dongle connected that authorizes it. You can download the crack below. Follow the read me file for instructions on how to use it.

*   That’s it.

TIS2000 Windows 8 32 bit:

However, if you have a 32-bit copy of Windows 8 installed (I don’t wanna know why you do), running 16-bit applications are disabled by default. You can enable it by going to Control Panel and clicking on 16-bit Application Support then clicking Enable.

TIS2000 Windows 7 with XP Virtual PC:

For those of you with genuine copies of Windows 7 Professional, Enterprise, or Ultimate with a multi-core processor (who doesn’t run Win7 on a multi-core these days); these versions of Windows 7 allow you to use Windows Virtual PC, which lets you virtually run Windows XP Pro without a disc or OS installation. You need to install Windows XP Mode and Windows Virtual PC in order to use it. Before you can download these updates, M$ makes you run a little .exe that checks if your OS install is legitimate. Anyway, after you get that all installed and XP Mode is booted, you can copy the OP’s cracked TIS2000.zip over to the WinXP Desktop and follow the README.txt inside to install it. Here is a link with the cracked TIS2000http://www.obd2eshop.com/wholesale/tis2000-cd-and-usb-key-for-gm-tech2-gm-car-model-software.html…I have tested this on my desktop running Windows 7 Ultimate 64-bit and the cracked copy of TIS2000 the OP posted installed and ran with no problems. Instructions for Win7 XP Pro virtualization mode here: http://windows.microsoft.com/en-us/w…e-in-windows-7

TIS2000 software Window 64 bit or 32 bit:

64-bit versions of Windows contain backwards compatibility with 32-bit applications, but not with 16-bit applications. And 32-bit versions of Windows are backwards compatible with 16-bit applications. The problem with installing TIS2000 on newer machines is that, while the TIS2000 program itself is 32-bit, the installer and drivers are 16-bit. Therefore, you are able to install TIS2000 natively on ANY 32-bit Windows system. This will just work, without having to run anything in compatibility mode.

Now to the most common problem:

If you are running a 64-bit version of Windows XP, Windows Vista, Windows 7 Home Premium or lower, or ALL versions of Windows 8 and 8.1, I guess any version of Mac or Linux too, you have a couple of more involved and more risky options…

You can obtain a copy of Windows 2000 or XP Pro 32-bit. It includes two programs for making a bootable CD or USB drive. Pop the bootable device you created into your laptop, reboot to the device, then install that operating system onto a seperate partition of your hard drive, or a different hdd altogether. Or you can install Virtualbox (free software), and run the cracked Windows copy via a virtual machine… The method I took to test this was to create a separate partition on my ssd and install it there. When the computer reboots, it will ask you what OS you would like to run. Select Windows XP Pro, then continue installing TIS2000 software. If you’re gonna be writing to the main drive on your computer, I suggest first creating a bootable USB with Clonezilla on it and creating a drive backup with that http://clonezilla.org/downloads.php  …This allows you to make a complete backup image of your hard drive, and allows you to flash it back to that drive at any time. A good thing to have around anyway.

VXDIAG VCX NANO GM + TIS2000:

IT works!! ok for anyone trying to use the VXDIAG GM nano with SPS this is what you need to do (order is important):

*** please note you cannot use the VM that the VXDIAG package comes with (GDS2 VM). It’s configured in such a way it won’t work with the dongle crack and caused me a lot of head scratching to find this out.

*   Create awindowsXP 32bit VM using VMWare Player
*   Make sure you add an LPT port (set to auto, not connected on startup). It doesn’t matter if your actual PC has an LPT port or not this is needed for the dongle crack later.
*   Install VMWare tools for your VM
*   After you have the windows VM up and running install the BOSH MDI drivers found here: http://www.boschdiagnostics.com/pro/soft…-and-mdi-2(the MDI drivers on the driver disk andvxmanagerinstaller wouldn’t install on myxp32bit VM but the one from bosh does).
*   From the driver disk or from allscanner.com install the VXDIAG MDI package with pass thru driver (VXDIAG MDI manager or VXDIAG Manager

*   (files / instructionsin the updated.txt you may need to click the link more than once if you get an error when downloading)
*   Mount the tis_data_1.iso in your VM (use the virtual cdrom in vmware player and attach to iso file) this will start the auto install of the TIS2000 2007.3 software)
*   All options can be installed using the default selectionshowevermake sure you check the install checkbox above the parallel security device on the one screen.
*   After installation is complete you can extract the TIS2000DongleCrack.rar and copy the folder to the desktop of your VM
*   Go into the TIS2000DongleCrack folder locate the drivers folder and open it, run the DDINST32.EXE (if you get a registry error you didn’t install an LPT port in your VM), select Express and it should install the files then click ok / Exit to close.
*   Go back to the main TIS2000DongleCrack folder and copy SCAControlUI.exe and Id.dll to c:\Program Files\cosids\bin\ (it will prompt to replace id.dll select yes).
*   Go back to the main TIS2000DongleCrack folder into the Dongle folder and copy the 2 files in there to c:\windows\system32\ (the dongle crack is now installed)
*   Now mount the tis_data_2.iso in your VM (use the virtual cdrom in vmware player and attach to iso file) and open TIS2000 (double click the icon on your desktop) when TIS opens it will ask you if you want to upgrade click yes.
*   After the upgrade completes mount the GM-NAO-TIS200-3_2008.iso in your VM (use the virtual cdrom in vmwareplayer and attach to iso file) and open TIS2000 ( double click the icon on your desktop) when TIS opens it will ask you if you want to upgrade click yes.
*   After the upgrade completes you have successfully installed TIS2000 2008.3 and the Dongle crack, now we need to configure TIS to use the VXDIAG GM nano
*   Open TIS2000 from the icon on your desktop, select Configuration menu from the top and select IO Management.
*   Click the Driver button, click the Browse button, locate the j2534.dll file in the window and click open (installs the J2534Pass Thru Driver)
*   Now click the Add button (in IO management) enter exacly “Generic Pass Thru” in Logical Name and select “J2534Pass Thru Driver” in the Driver drop down, click OK.
*   Select Generic Pass Thru in the list and click Properties, in the Device Name drop down select VXDIAG, (ALLScanner) and click ok then click close to close IO Management.

Now TIS2000 software is installed and configured all you have to do is connect your VXDIAG device to the PC / VM. To do this first use a usb and connect it to the PC then in the VMWare player menu go in removable devices and connect the Future Devices USB to serial converter. At this step my windows install didn’t have the basic usb to serial drivers so I connected the VM to the network (if not connected use the VMWare player menu to connect the network) and windows downloaded them from the net and installed the device as com3. you are now good to go.

At this point you can now click on SPS in TIS2000 select Generic Pass Thru as your device and your good to program!!

Satisfied, VXDIAG VCX NANO GM device works as a clone to the GM MDI.

Credits to wizzardsl writing for the how-to’s for us.

https://gmscantool.blogspot.com/2021/05/gm-tech-2-tis2000-crack-download-to.html


:: برچسب‌ها: tech2 ,
:: بازدید از این مطلب : 316
|
امتیاز مطلب : 3
|
تعداد امتیازدهندگان : 1
|
مجموع امتیاز : 1
تاریخ انتشار : دو شنبه 31 خرداد 1400 | نظرات ()
نوشته شده توسط : lily

Beginner’s guide on using GM Tech2 scan tool on SAAB

gm-tech2-scanner

Recently, we have quite a few future-buyers asking about GM Tech2 scan tool. Here obd2tool would like to share a simple guide for SAAB with pictures for GM Tech2 beginners. To use the scanner on SAAB, you will need a 32MB PCMCIA card. Some functions are hidden and work in conjunction with other functions (like rolling locks, keyout unlock).

How to connect Tech2 scanner to SAAB OBD port

1. DLC cable connection
2. SAE 16/19 pin adapter (P/N 300098)

How to turn off seat belt alarm:

This function is in “Most Common Adjustments”

Select your Saab year and model then select all.

Make sure your key is set to On.

Then you will see these options on your Tech2 screen:

Select F5. Most Common Adjustments

This brings you to:

Select Seat Belt Reminder = Off

How to Program DDM, Enable Comfort Open/Close, Learn Pinch
________________________________________
Prerequisites:

Security via TIS2000! Without this you would not be able to add anything!!!

Go to main menu, select F0: Diagnostics and then select your model and year.

Select F7: Add/ Remove

How to add modules

Thanks for reminding me Tech2! I will do this down below!

Looks like Tech2 caught an error! Passenger door’s anti-pinch was disabled somehow… It fixes it automatically.

So that was pretty straight-forward right? Now hit Exit and go back. We have to setup pinch protection under the service tab…

Holy Cow! My fingers almost were chopped off!!!

That’s pretty much the same for adding all modules. I have to say, autosuggest is your best friend. If you mess up adding wrong part, the ECU will catch the mismatch. Bonus.

This guide was originally posted in saabcentral forum.


:: بازدید از این مطلب : 314
|
امتیاز مطلب : 10
|
تعداد امتیازدهندگان : 4
|
مجموع امتیاز : 4
تاریخ انتشار : چهار شنبه 5 خرداد 1400 | نظرات ()
نوشته شده توسط : lily

Question:
I need to program a psg16 pump vp44 (the Opel Vectra 2.2 dti car got several electrical errors due to a PSG16 change). I see that gm tech2 scanner can do it. If I buy a new PCMCIA card, can I get it working? the MDI/MDI2 can I also program?
Answer:
You can flash/swap PSG16 pump via SPS original software.
If you want to program PSG16 you can easily do it with tech2 and TIS2000, GlobalTis v32 or Tis2web. You can buy any card because you can overwrite the software that you need from TIS.
You also can use GM MDI or GM MDI2 or AVDI or any good/approved J2534 tool can be used to do SPS Programming in PSG16.
You download sps on PCMCIA card then cut from card read.
gm-tech2-psg16-sps-programming

EDC 15 / PSG 16 Reprogramming by Tech2 via SPS

Follow the description below carefully to ensure success.

gm-tech2-psg16-sps-programming.jpg

1. Connect TECH2 scan tool to the data link connector.

2. Start TECH2 and select F5: Service Programming System (SPS).

3. Select F0: Request Information.

4. Then select: model year, vehicle type, group, system

5. Follow the instructions in TECH2.

6. Disconnect TECH2 from the vehicle and connect it to the COM port of the computer (flat cable). TIS2000 must be installed on the computer.

7. Check that the software of the computer is newer than that of EDC 15/PSG 16. If so, download it to TECH2.

8. Disconnect TECH2 from the computer and reconnect it to the vehicle.

9. Start TECH2 and select F5: Service Programming System (SPS).

10. Select F1: Program control module.

11. Follow the instructions in TECH2.

12. Wait until programming is complete. This takes approx. 7 minutes.

13. Once programming is complete: switch off the ignition.

14. Test start the engine.

15. Read and clear any DTCs in the control unit. A DTC will be generated because the pump control unit loses communication with EDC 15/PSG 16 during programming.

16. Final check:

Clear DTCs in all systems.

Execute one operating cycle (run the vehicle at varying engine load and speed for five minutes).

Evaluate the operating cycle (check that DTCs were not regenerated).


:: بازدید از این مطلب : 318
|
امتیاز مطلب : 9
|
تعداد امتیازدهندگان : 3
|
مجموع امتیاز : 3
تاریخ انتشار : چهار شنبه 5 خرداد 1400 | نظرات ()
نوشته شده توسط : lily

This article shows you step by step how to properly remove the back panel of an Maxisys Elite in order to install an SD Card for expanded memory.

Today we will go over some questions about the Mac CSIS elite and where the SD card is located on the tool.

The reason why you might want to insert the SD card it’s if you get messages during your updates.

If you see here if I try to download GM it’s gonna refuse to download and tell me that I don’t have enough space.

So one way is to remove other vehicles that are already downloaded but we do not recommend that so in order to increase the memory we have to add the SD card into the tool.

click ok and let’s flip the tool to the back, if you flip the tool over and pull up the stand you will see screws around the edge that you’re supposed to remove, what you will need is a t5 Torx screwdriver, yours will be green and yellow which is included in your kit.


Now let’s remove the screws, once you remove the screws you can take off the back cover and expose the
battery, you will see the microSD card slot in the top left corner, go ahead and move the battery to the side slightly without disconnecting it to access a slot.


go ahead and insert a 16 gigabyte sandisk micro SD card class 10 you can go up to 32 you don’t necessarily need anything larger than that once you have the SD card in

go ahead and put the screws back into the cover once you have the SD card in the tool

go ahead and go to Data Manager then vehicle management, it will show you only for vehicles that you can move to the SD card

so what you have to do is by one by one hit the download button and let that move over to the micro SD card inside the tool

once you’re able to download all the vehicles

go back into updates and start doing your update you’ll see that it starts to download now


:: برچسب‌ها: MaxiSYS Elite ,
:: بازدید از این مطلب : 323
|
امتیاز مطلب : 7
|
تعداد امتیازدهندگان : 3
|
مجموع امتیاز : 3
تاریخ انتشار : پنج شنبه 23 ارديبهشت 1400 | نظرات ()
نوشته شده توسط : lily

This article shows you step by step how to properly remove the back panel of an Maxisys Elite in order to install an SD Card for expanded memory.

Today we will go over some questions about the Mac CSIS elite and where the SD card is located on the tool.

The reason why you might want to insert the SD card it’s if you get messages during your updates.

If you see here if I try to download GM it’s gonna refuse to download and tell me that I don’t have enough space.

So one way is to remove other vehicles that are already downloaded but we do not recommend that so in order to increase the memory we have to add the SD card into the tool.

click ok and let’s flip the tool to the back, if you flip the tool over and pull up the stand you will see screws around the edge that you’re supposed to remove, what you will need is a t5 Torx screwdriver, yours will be green and yellow which is included in your kit.


Now let’s remove the screws, once you remove the screws you can take off the back cover and expose the
battery, you will see the microSD card slot in the top left corner, go ahead and move the battery to the side slightly without disconnecting it to access a slot.


go ahead and insert a 16 gigabyte sandisk micro SD card class 10 you can go up to 32 you don’t necessarily need anything larger than that once you have the SD card in

go ahead and put the screws back into the cover once you have the SD card in the tool

go ahead and go to Data Manager then vehicle management, it will show you only for vehicles that you can move to the SD card

so what you have to do is by one by one hit the download button and let that move over to the micro SD card inside the tool

once you’re able to download all the vehicles

go back into updates and start doing your update you’ll see that it starts to download now


:: برچسب‌ها: elite ,
:: بازدید از این مطلب : 315
|
امتیاز مطلب : 94
|
تعداد امتیازدهندگان : 34
|
مجموع امتیاز : 34
تاریخ انتشار : پنج شنبه 23 ارديبهشت 1400 | نظرات ()
نوشته شده توسط : lily

Launch-X431-PAD-V-New-Arrival-Supports-ECU-Programming-1

Launch X431 PAD V also named PAD 5(global version ), comes with with Smart Box 3.0 supports ecu programming, based on Android 7.1 customized system, Qualcomm 8-core processor, 10.1 inch capacitive touch screen, support QC3.0 fast charging. 2 year free update. X431 PAD5 supports online programming as well, since Mercedes scn login is not availabel now, X431 pad v is a good replacement to do scn online coding. Supports both passanger vehicles and hevay duty trucks.

Launch-X431-PAD-V-New-Arrival-Supports-ECU-Programming-1

Launch X431 PAD V Scanner Highlights

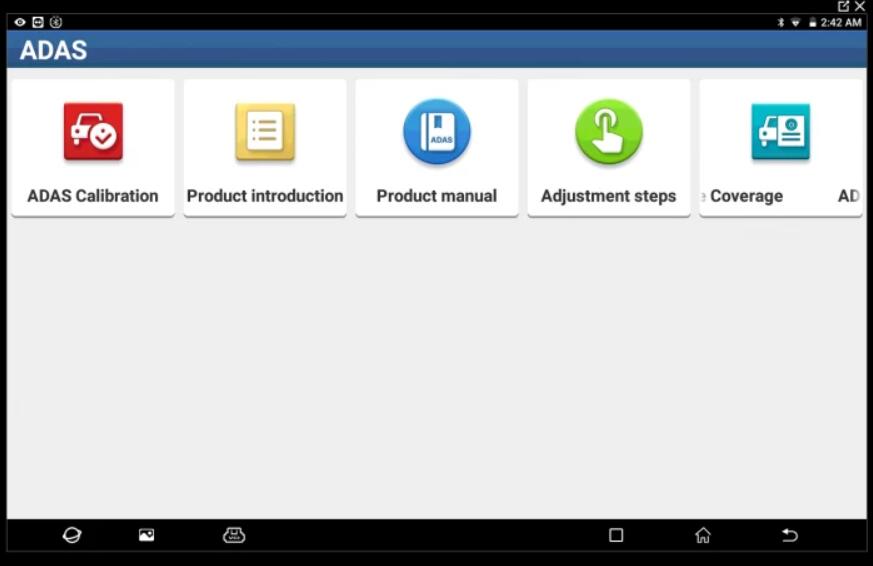
*   ADAS calibration Supported
*   Advanced ECU programming & coding
*   VW & Audi Guided Functions
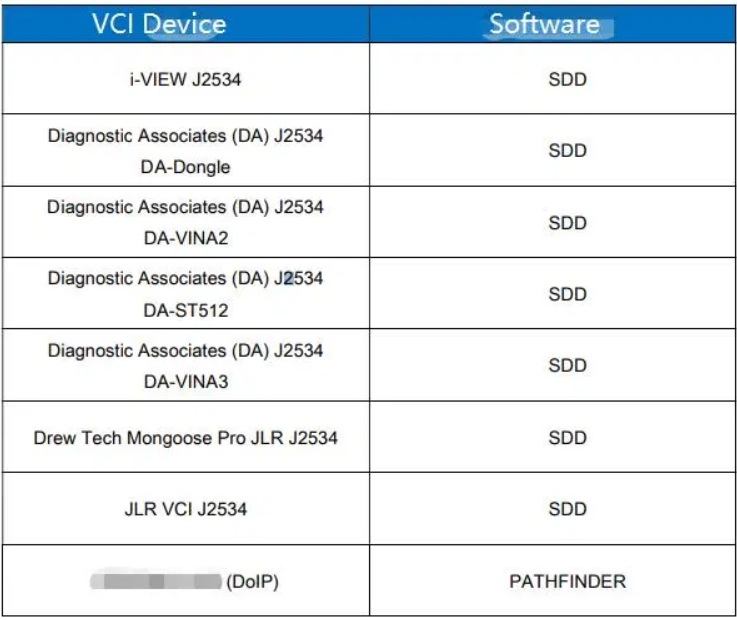
*   Compatible with J2534 & DoIP
*   26 Bi-directional Special Service Functions
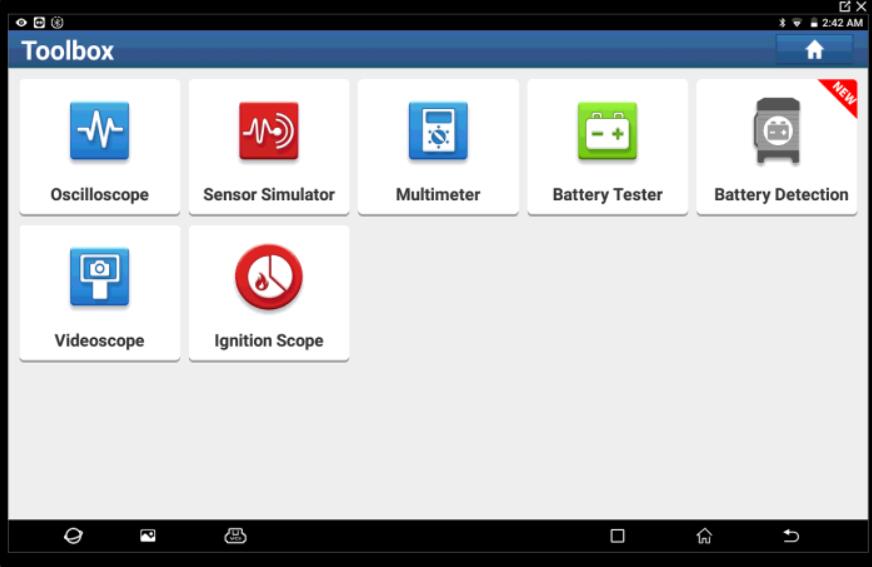
*   supports LAUNCH extension module applications for oscilloscopes, sensors, endoscopes, multimeters, and battery detection etc.

Top 10 Reasons To Choose Launch X431 PAD V

1. Android 7.1 customized system, Qualcomm 8-core processor, 10.1 inch capacitive touch screen, support QC3.0 fast charging.

2. 2.4GHz & 5GHz Dual-Frequency Wi-Fi, the transmission rate is faster than the previous generation.

3. Support commercial vehicle and passenger car diagnose, Support J2534, CAN FD, DoIP.

4. Wide mode coverage, powerful and a large number,of diagnostic functions, and accurate test data.

5. Brand new industrial design, with soft rubber sheath on the four corners of the product, to effectively prevent collision; damping shaft, free adjustment of nearly 180 degrees; support three modes of hanging, support and normal.

6. Full vehicle system coverage for over 110 brands in the world, which is continually updated

7. Full-function scan tool for both 12V cars and 24V 36V heavy duty (heavy duty need to purchase additional software)

8. Online Programming:
BMW, Mercedes, VW, Audi, Seat, Skoda, Porsche, Nissan, Infiniti, Subaru
LAUNCH X431 PAD V supports SCN coding until the 2020 model!

9. Multi-Languages:
Italian English Chinese German Japanese Russian French Spanish Portuguese Polish Turkish Dutch Greek Danish Arabic Korean Persian Finnish Swedish Romanian Czech Hungarian

10. Update:
Free Update online for 2 years. It takes $399 annual upgrade after that.

11. Support some car makes coverage till 2020, incl. Benz, Fiat, BMW, Audi, Skoda, VW, Citroen, Land Rover, Jaguarm Smart, Peugeot, Porsche, Volvo, Honda, Toyota
Launch X431 PAD V Powerful Functions

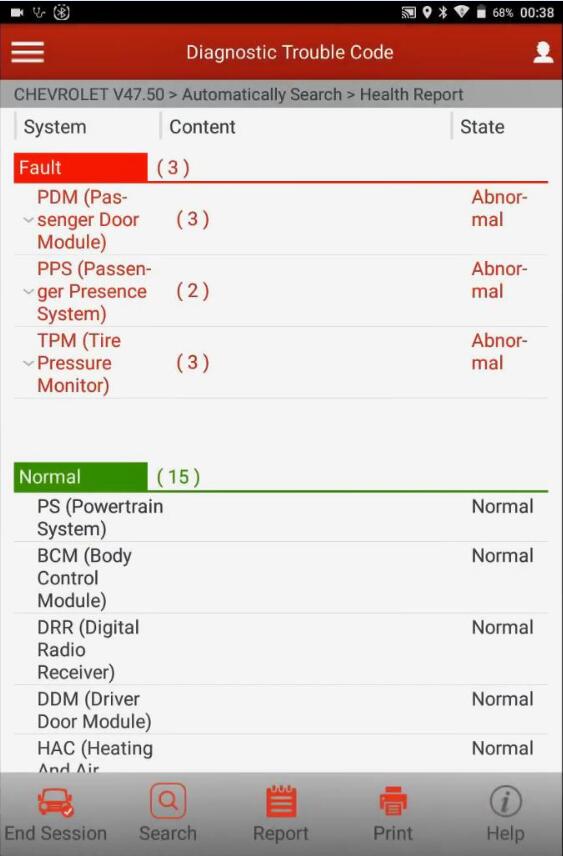
1. Comprehensive diagnosis: Support full-make, full-system, full-function rapid diagnosis, read DTC, clear DTC, read data stream, actuation test, etc.

2. Intelligent diagnose: Support intelligent VIN identification and cloud-based diagnostic record query, making the diagnostics more intelligent and efficient.

3. Local diagnose: When the intelligent diagnosis is not available in an environment without network, choose traditional diagnosis. Select the vehicle make and model manually to perform the vehicle detection.

4. Remote diagnose: Support online real-time communication and remote diagnostic service through text, picture, and file between device and device, and between device and remote desktop, with low network bandwidth and system resources occupancy.

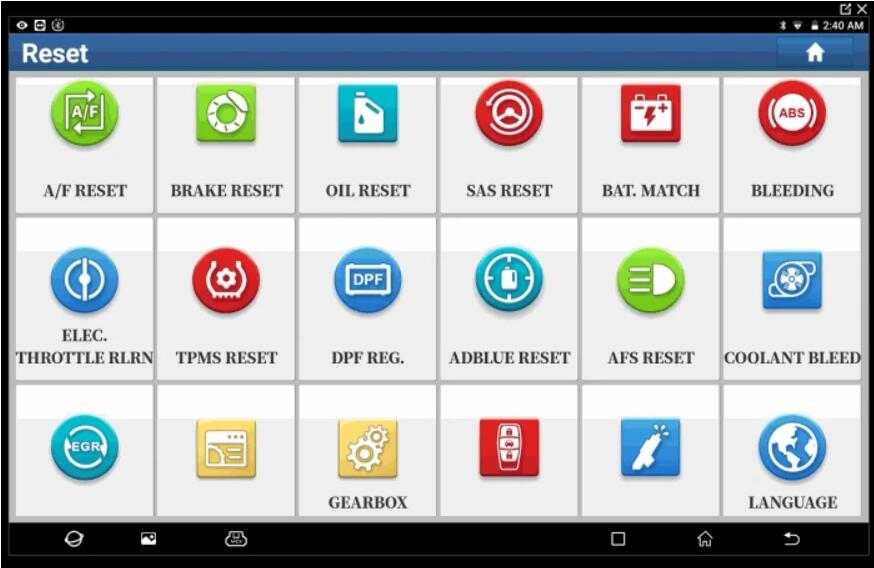
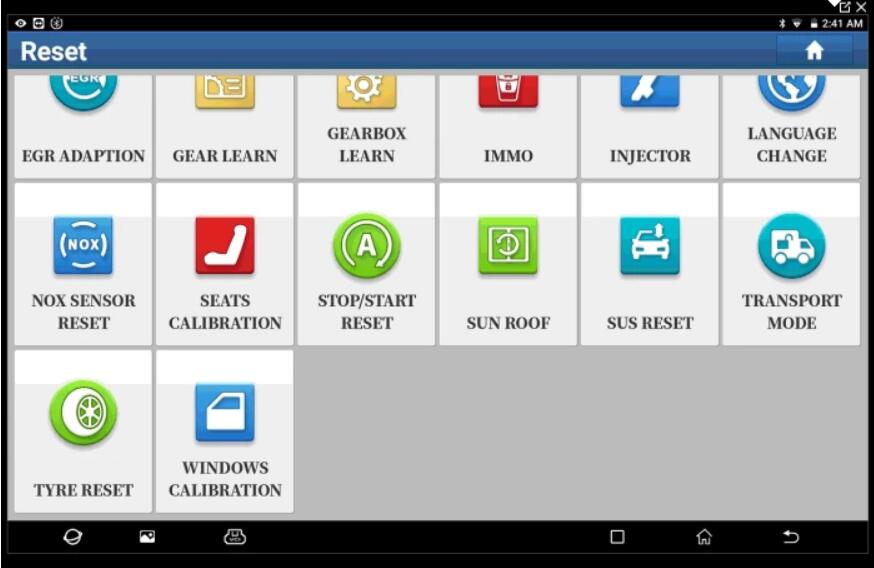
5. Special function: Support total 16 special functions, including service lamp reset, throttle adaptation, steering angle reset, brake pad reset, tire pressure reset, anti-theft matching, ABS bleeding, battery matching, gear learning, injector coding, DPF regeneration, sunroof initialization, headlamp matching, suspension matching and AT matching, EGR Adaption.

6. Software upgrade: Support one-click upgrade of operation system, client side, car model software and firmware.

7. Diagnostic feedback: For model software and function errors met during the use, please submit the feedback immediately. LAUNCH will response as soon as possible.

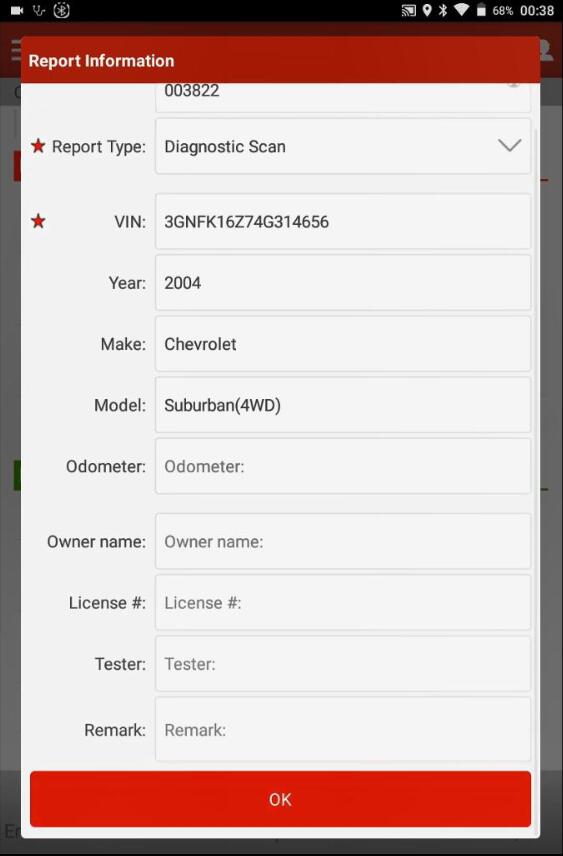
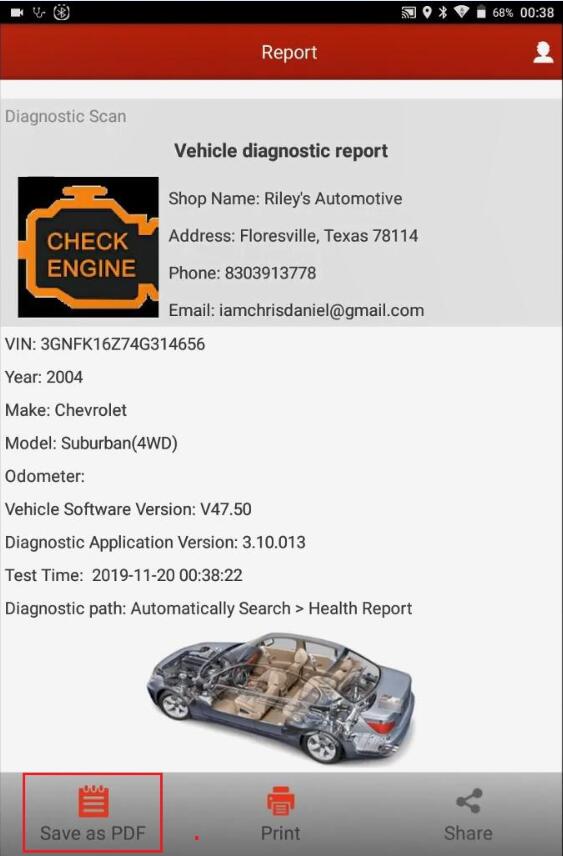
8. My report: View comprehensive diagnostic report, remote diagnostic report, and data stream playback.

9. Settings: Contains my connector, diagnostic connector connection management, connector activation, firmware repair, etc.

10. Extended module: Support oscillograph, sensor, battery test, endoscope, Wi-Fi printer, etc.

11. Guided function for VW and Audi

12. 26 special service functions available

13. ADAS calibration function is optional

14. Support USB Type C & Type A

Launch-X431-PAD-V-New-Arrival-Supports-ECU-Programming-2
Launch-X431-PAD-V-New-Arrival-Supports-ECU-Programming-3
Launch-X431-PAD-V-New-Arrival-Supports-ECU-Programming-4
Launch-X431-PAD-V-New-Arrival-Supports-ECU-Programming-5

Launch X431 PAD V Covers Both Passange Vehicles and Hevay Duty Tucks
Passenger vehicles (12V)

1. Australian: AUST Holden, AUST Ford

2. Asian: Toyota/Lexus, Honda/Acura, Mazda, Subaru, Nissan/Infiniti, Mitsubishi, Hyundai, Isuzu, Daihatsu, KIA, Daewoo, Suzuki, Proton, Tata, Mahindra, Ssangyong, Perodua, Maruti

3. European: Audi, Mercedes/Maybach, BMW/MINI/Rolls Royce, VW/Bentley/Bugatti, Opel/Vauxhall, Peugeot, Citroen, Volvo, Sprinter, Renault/Dacia, Fiat/Romeo/Abarth/Lancia, Rover, Landrover, Saab, Seat, Skoda, Smart, Maserati, Ferrari, Arston Martin, Porsche, Jaguar

4. USA: USA Ford/ Lincoln, GM/ Buick/ Cadillac/ Chevrolet, Chrysler/ Dodge/ Jeep

5. Chinese: Changcheng(Great Wall), Geely, Qirui_TY(Cherry), Futian, Changan, Changhe, Haifei ….etc.

6. Special: Immobilizer/Key, Injector, Reset Brake Bleed, Reset TPMS, Electronic Throttle Relearn, Reset DPF, Reset SAS, Reset Oil, Reset Brake, Reset BMS

7. Others: EOBD, Demo
Heavy Duty Truck Vehicles (24V)

*   Nissan (Diesel)
*   Mitsubishi (Diesel)
*   USA Ford Diesel, Kenworth
*   Astra, Benz Heavy Duty, Bosch Diesel, China Heavy Duty, Cummins Heavy Duty, DAF, Delphi Diesel
*   Denso Diesel, FAW Liberation, Foton Auman, FUSO, Hino, Hyundai Heavy Duty, Isuzu Heavy Duty
*   Iveco Heavy Duty, JAC Heavy Duty, Mack , MAN , OBD Heavy Duty, Scania, Shangchai Diesel, Volvo Heavy Duty
*   WP Diesel, Airbus, Allison Transmission Box, Ashok Rejlander, Bendix ABS, Caterpillar Heavy Duty
*   Chai Heavy Vehicle, Chaoyang Diesel, Construction Machinery, CREDO Heavy Vechicle, Detroit Engine
*   Dongfeng Commercial Vehicle, Dongfeng Yufeng, Doosan Engine, Freightliner Heavy Duty Truck
*   Full Diesel Diagnosis Software, Haldex ABS Heavy Duty, HD_ABS System, HD_GoldenDragon, HD_International
*   HD_Kinglong, HD_Maxxforce, HD_Tata, HD_Western_Star, Heavy Truck Presentation Software
*   IRISBUS HD, IRIZAR HD, NEOPLAN HD, Peter HD, Renault HD, SETRA HD, Stannic Bavin, Sterling HD
*   Sunlong Bus, Sunwin Bus, UD Trucks 2F Nissan Diesel, WABCO ABS, Yang Chai Engine

What’s Smarbox 3.0 with Launch X431 Pad V?

Smart Box 3.0, the new VCI with Linux system, supports USB, Bluetooth and WiFi connection, is comptibnle with CANFD, DoIP, J2534 and other diagnostic protocols. More powerful functions to be discovered by working with X-431 PAD V.

The VCI “SmartBox3.0”, which can only be used with PAD V, supports up to 36 volts.

Smart box 3.0 supports heavy-duty, medium-duty, light trucks. (Require extra software payment for heavy-duty models)

Smart box 3.0 covers all diagnostic protocols, J2534, D-PDU, RP1210, CAN FD, DoIP.

Launch X431 PAD V Parameters:
Processor                     8 core Cortex-A53 2.0GHz
Cache                          4GB
Hard Disk                    64GB, 128G extended
System                        Android 7.1
Screen                        10.1 inch full-fitting, sunlight readable screen (Gorilla Glass)
Resolution                  1920*1200
Wi-Fi                           Support 2.4GHz&5GHz dual frequency
Camera                       Rear13 Megapixels, front 8 Megapixels
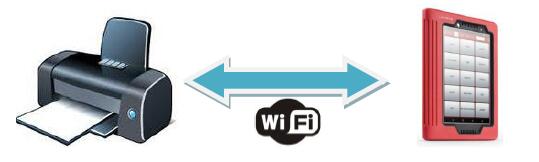
Diagnostic Mode        Wi-Fi
Work Temperature      -10 ~ 50℃
Dimension                  320×211×46mm
——————————————————————————————-

Enjoys!

If you want to learn more about launch Scanner, please visit our website obd2tool.com


:: برچسب‌ها: Launch X431 PAD V, ,
:: بازدید از این مطلب : 339
|
امتیاز مطلب : 7
|
تعداد امتیازدهندگان : 3
|
مجموع امتیاز : 3
تاریخ انتشار : پنج شنبه 19 فروردين 1400 | نظرات ()