نوشته شده توسط : lily

Porsche Piwis III Developer Mode:

The Developer Mode in Porsche Piwis 3 is not available when you update the shell, coz you lose the menu diagnostics configuration to switch between regular and developer mode,
Problem solved if you copy the old file com.porsche.piwis.Shell.exe.config

Here is how to update the shell config. and get the diagnostic configuration boxes back, on the system tab.

After a successful update from 37.250.20 you will loose the two above mentioned boxes from the System tab.
If you did not loose them, then the [PIDT] diagnostic software did not update completely.
So it’s a good thing to loose it !
Go to C:\PiwisApps\Shel\ and carefuly edit with notepad   this file –> com.porsche.piwis.Shell.exe.config
after the update the PIDT section shows up in green, after U edit it it will be blue.
First picture shows, red underlined, 2 places, beginning and the end of the green section, what to remove.
On top [Line 568 on mine] U delete  these four symbols       !–<     on the bottom [line 603 on mine] U delete these 3 symbols   –>
Then U save the config file.
Restart the PC and your Diagnostic config box for 991,981,970 and Diagnostic config for other models RE-APPEAR.
rm996 has the solution how get the developer functionality back up and running, !!!
[Similar solution for the lost with the Update Wiring Diagrams ]

How-to-update-shell-config-for-Porsche-Piwis3-1 (2)

How-to-update-shell-config-for-Porsche-Piwis3-2 (2)

Another tip might help you also.

It’s how to enable Developer Mode for Piwis 3

Developer mode is a special Piwis program that allow a lot of advanced coding normally reserved only to Factory.
With this function you will have a tool that can do more than software of official Porsche Dealer.
For example, you can reprogram all ECUs completely offline.

How to use Piwis Developer Mode:

Install winrar and winhex on your computer.
-1-locate the file c:\program files\porsche\PIDT_P_MIG_DLSS3\pidt\plugins\de.dsa.pidt.datatype.jar and copy it on your desktop in order to modify it.
Open it with winrar,in the wirar windows locate the file
\de\dsa\pidt\datatypes\utils\Helper$1.class and drag it on your destop , delete it from the archive after the copy, keep the winrar window open.
Open Helper$1.class on your desktop with winhex and goto offset E81, replace 9A by A7 and save.
Drag back the save file on the winrar windows still open and click OK.Close winrar
Copy the new file de.dsa.pidt.datatype.jar you just made in
c:\program files\porsche\PIDT_P_MIG_DLSS3\pidt\plugins, overwrite it.
copy the file aftersales.sig on your desktop and rename it development.sig.Copy this file back in the folder
Do exactly the same method given above with the folder c:\program files\porsche\PIDT_P_MIG_DLSS3 with its own files.
To transform it in developer :
Settings
Diagnostic configuration
981-991, mode, operating mode, E= development, P= production, V= aftersales ( regular piwis)
Other models line, mode, operating mode, E= development, P= production, V= aftersales ( regular piwis)
This method to switch between regular and developer works only with my backup and will not work anymore after
an update.

Images:

How-to-update-shell-config-for-Porsche-Piwis3-3 (2)
How-to-update-shell-config-for-Porsche-Piwis3-4 (2)
How-to-update-shell-config-for-Porsche-Piwis3-5 (2)

Maybe this helps Folks some.


:: بازدید از این مطلب : 376
|
امتیاز مطلب : 0
|
تعداد امتیازدهندگان : 0
|
مجموع امتیاز : 0
تاریخ انتشار : سه شنبه 21 مرداد 1399 | نظرات ()
نوشته شده توسط : lily

Look here: Allscanner VXDIAG VCX DoIP Porsche Tester PIWIS 3 vehicle coverage

Compatibility:
Porsche from year 2005 to 2018, including post-2017 vehicles with DoIP protocol
Porsche 911(997) (991)
Boxster/Cayman (987)
Cayenne up to MY 2010
Cayenne from MY 2011
Panamera
Especially the latest models:
Paramera (971) 2018
Caynenne (92A) 2018
Macan (95B) 2018
911 (991) 2018
and other old models

Porsche PIWIS III Model Selection:
*Some other models can be selected only by connecting device with vehicle.
911:
992
992 Campaign
991
997
996
996 GT2
996 GT3
993, 964
VXDIAG-Porsche-PIWIS-3-PTG3-Model-List-1 (2)
Boxster:
982
981
987
986
VXDIAG-Porsche-PIWIS-3-PTG3-Model-List-2 (2)
Cayman:
982
981
987
VXDIAG-Porsche-PIWIS-3-PTG3-Model-List-3 (2)
Cayenne:
9YA
9YA Campaign
92A
9PA
VXDIAG-Porsche-PIWIS-3-PTG3-Model-List-4 (2)
Panamera:
971
970
VXDIAG-Porsche-PIWIS-3-PTG3-Model-List-5 (2)
Macan:
Macan
VXDIAG-Porsche-PIWIS-3-PTG3-Model-List-6 (2)
981 Spyder:
981 Spyder
VXDIAG-Porsche-PIWIS-3-PTG3-Model-List-7 (2)

Racing cars:
935
991 GT2 RS Clubsport
982 Cayman GT4 Clubsport
981 Cayman GT4 Clubsport
VXDIAG-Porsche-PIWIS-3-PTG3-Model-List-8 (2)

Miscellaneous:
Carrera GT
GT1
968
944
928
VXDIAG-Porsche-PIWIS-3-PTG3-Model-List-9 (2)
External component:
External component
VXDIAG-Porsche-PIWIS-3-PTG3-Model-List-10 (2)

Porsche Piwis 3 Software:
Piwis III 38.300.030 – confirmed to work no issues
Diagnostic test: passed
Coding: passed
Programming: passed

VXDIAG Porsche Piwis 3 Instruction:

– Porsche Piwis 3 diagnosis + car list
– Porsche Piwis 3 Engineering
– Porsche Piwis 3 wiring diagram
– Porsche Piwis 3 remote help


:: برچسب‌ها: Porsche Tester Piwis III ,
:: بازدید از این مطلب : 353
|
امتیاز مطلب : 0
|
تعداد امتیازدهندگان : 0
|
مجموع امتیاز : 0
تاریخ انتشار : سه شنبه 21 مرداد 1399 | نظرات ()
نوشته شده توسط : lily


Caterpillar electronic technician 2020B with WinFlash is an updated version of the caterpillar dealer diagnostic software

Microsoft ended extended support for Windows 7 as of January 2020. The CAT ET service tool no longer supports Windows 7 as of the 2020B release. The installation is still possible, but we’re not able to guarantee the stable work of 2020B

In case if you still running windows 7, we can offer you the 2020A version as last compatible with windows 7, for this purpose, please indicate 2020A release in the comments field.

The Built-in Factory Password Generator

The experimental feature allows you to decode (18-Bit passwords not supported) factory passwords

Cat works with the Caterpillar Communication Adapters family.
The recommended adapter is a Caterpillar Communication Adapter III Kit PN 538-5051 (Replaces 466-6258).
This diagnostic app allows you to: Change vehicle’s parameters Lock / Unlock parameters Diagnose and reconfigure Reading of error codes ECM Flash

Recently, we have received a lot of questions about the most convenient way to obtain this product.

As soon as payment is done you will be redirected to the download page.

The Electronic Technician application can be easily downloaded.

The small file size(~ 500Mb) allows you to get and set up the app within up to 20 minutes even with the slow internet connection or mobile internet.

The activation takes like 5 minutes and you’re ready to go.
Error When Launching Service Tool

There is a Microsoft issue with upgrading libraries during an installation involving certain versions of the C++ redistributable. After a successful service tool installation, when trying to run the service tool for the first time, one of the following errors may occasionally appear: “The entry point could not be located in api-ms-win-crt-runtime” or “The program can’t start because mfc140u.dll is missing from your computer.” If either of these messages is displayed, follow the procedure below. This procedure requires administrator rights.

1. Open the Start Menu
2. Click the Control Panel
3. Click the “Programs and Features” icon. If there is only a “Programs” icon, click the “Uninstall a Program” link next to the icon.
4. Find the program entry for either “Microsoft Visual C++ 2015 Redistributable (x86) – 14.0.24215″ or “Microsoft Visual C++ 2015 Redistributable (x86) – 14.0.242151″
5. If the specified program entry is not found, proceed directly to step 8
6. If the specified program entry is found:
a) Right-click the specified program entry
b) Click the Change menu item
c) Click the Repair button in the dialog that appears
d) Verify that the service tool runs properly
7. If the service tool still displays an error after the Repair operation:
a) Right-click the specified program entry
b) Click the Uninstall menu item
8. Click the link below to download an x86 version of the runtime package from Microsoft.

https://download.microsoft.com/download/6/A/A/6AA4EDFF-645B-48C5-81CC-ED5963AEAD48/vc_redist.x86.exe

9. Install the downloaded package
10. Verify that the service tool runs properly
11. If the service tool still displays an error, please send an email to the support department.
Caterpillar ET Getting Started Guide in PDF Format
What’s New – 2020B

Trainer Update – 299D3

The 299D3 Skid Steer Loader has been added to the Trainer application.
What’s New – 2020A

Product Status Report Updates

The Product Status Report has been updated to include throttle configuration information.

Built-in Factory Password Generator

The experimental feature allows you to decode (18-Bit passwords not supported) factory passwords
What’s New – 2019C

Indication of Selected Communications Adapter

The service tool now displays the selected communications adapter when the service tool is disconnected. The adapter name is displayed in the status area at the bottom right of the service tool window.

End of Support for Windows 7

Microsoft is ending extended support for Windows 7 as of January 2020. The service tool will be ending support for Windows 7 as of the 2020A release.
What’s New – 2019B

Automatic Product Status Report (PSR) Upload

The service tool includes a new tool that automatically uploads Product Status Reports. The tool scans for newly generated Product Status Reports and uploads them when an internet connection is available. The default is that automatic report uploading is enabled. The Preferences dialog has an option to disable the tool.
What’s New – 2019A

ECM Naming Changes

Certain ECMs connect to the service tool over two data links at the same time. The service tool shows a message popup when the ECM is only detected on one link. The service tool has been changed to add the text **INCOMPLETE** in the ECM name when the connection is incomplete. Service tool features that display a connection icon also use a new icon for an incomplete connection.
What’s New – 2018C

No significant new features or feature enhancements
What’s New – 2018B

CEOS Fleet Configuration File TOP

A CEOS (Customer Electronic Option Selection) Fleet Configuration File can be created/modified for an engine using the Service Tool. This is available in connected and disconnected mode.

Error When Launching Service Tool

There is a Microsoft issue with upgrading libraries during an installation involving certain versions of the C++ redistributable. After a successful service tool installation, when trying to run the service tool for the first time, one of the following errors may occasionally appear: “The entry point could not be located in api-ms-win-crt-runtime” or “The program can’t start because mfc140u.dll is missing from your computer.” If either of these messages is displayed, please let us know and we will send you to step by step troubleshooting guide. This procedure requires administrator rights.
Service Tool License Corruption Issues with Windows 10 Updates

Windows 10 updates 1709 and 1803 will corrupt service tool licenses. Future Window 10 updates may do the same

If either of license error messages is displayed, please let us know and we will send you to step by step troubleshooting guide.
What’s New – 2018A

Trainer Update – 988K XE Wheel Loader

The 988K XE Wheel Loader has been added to the Trainer application.

What’s New – 2017C

Preferences Option to Save a Product Status Report to PDF

The Preferences dialog for the Product Status Report has changed. The dialog contains a new checkbox to automatically save a Product Status Report as a PDF file when the report is created. The service tool will continue to automatically save Product Status Reports as an XML file.

What’s New – 2017B

Product Status Report Updates
The Product Status Report has been updated to include certain history features supported by the ECM, such as the after-treatment Regeneration History and the Service Test History.
Winflash Screen Update
The screen for the Winflash feature has been updated. A new Expand All button opens all sections of the screen to show all details for ECMs detected by WinFlash. A new Collapse All button hides all sections of the screen, except for header rows showing detected ECM names.
PC, Communication Hardware, and Cable Requirements

To run the service tool, the next PC, communication hardware, and cable requirements must be met. NOTE: The minimum PC Configurations should not be used as a standard when buying new personal computers for service tool purposes. If the existing equipment meets these minimum requirements, it will run the service tool.
PC Requirements
Recommended Configurations

PC containing a 2.0 GHz dual-core processor
3GB RAM
3GB of the available hard disk drive
DVD-ROM drive (optionally)
15.4-inch XGA Screen (1280×1024 compatible)
Microsoft Windows? 7 Professional or Windows 8 Professional, Windows 10 Professional (Not tested with Home Edition) (Note: Windows 8 RT is not supported)
RS232 port with 16550AF UART or compatible (for use with Comm Adapter II)
USB 1.1 or 2.0 port (for use with Comm Adapter 3)
Ethernet RJ45 connector
Built-in pointing device or mouse
For security purposes, Microsoft Internet Explorer version 11 or newer or Microsoft Edge is recommended.
Note: The most recent version of Microsoft Internet Explorer may not be validated to work with the service tool.
Wi-Fi (for the Wireless Comm Adapter 3)
Minimum Configurations

PC containing a Pentium 2 GHz processor or greater
1GB RAM
500MB of an available hard disk drive
CD-ROM drive
Super VGA monitor or display (1024×768)
Microsoft Windows? 7 Professional or Windows 8 Professional, Windows 10 Professional (Not tested with Home Edition) (Note: Windows 8 RT is not supported)
RS232 port with 16550AF UART or compatible (for use with Comm Adapter II)
USB 1.1 or 2.0 port (for use with Comm Adapter 3)
Ethernet RJ45 connector
Built-in pointing device or mouse
For security purposes, Microsoft Internet Explorer version 9 or newer is recommended. Note: The most recent version of Microsoft? Internet Explorer may not be validated to work with the service tool.
Communication Hardware

Caterpillar Communication Adapter III Kit PN 538-5051 (Replaces 466-6258)

Configuring Cat Electronic Technician to use the Communication Adapter 3
For Cat Electronic Technician to work with the Communication Adapter 3, the settings must be changed to select the Communication Adapter 3 as the Communication Interface Device:
Step 1 Start Cat Electronic Technician.
Step 2 Click the Stop Connect button when it appears.
Step 3 Select the utility menu.
Step 4 Choose “Preferences > Modify…”.
Step 5 Select the Communications tab.
Step 6 Select Cat Comm Adapter 3 (RP1210) and click OK.
NOTE: Because a growing number of products require multiple data link service, the “Enable Dual Datalink Service” checkbox has been pre-selected.
Servicing ECMs on more than one data link requires this checkbox to be enabled.
Failure to do this will result in undetected ECMs and reduced functionality.

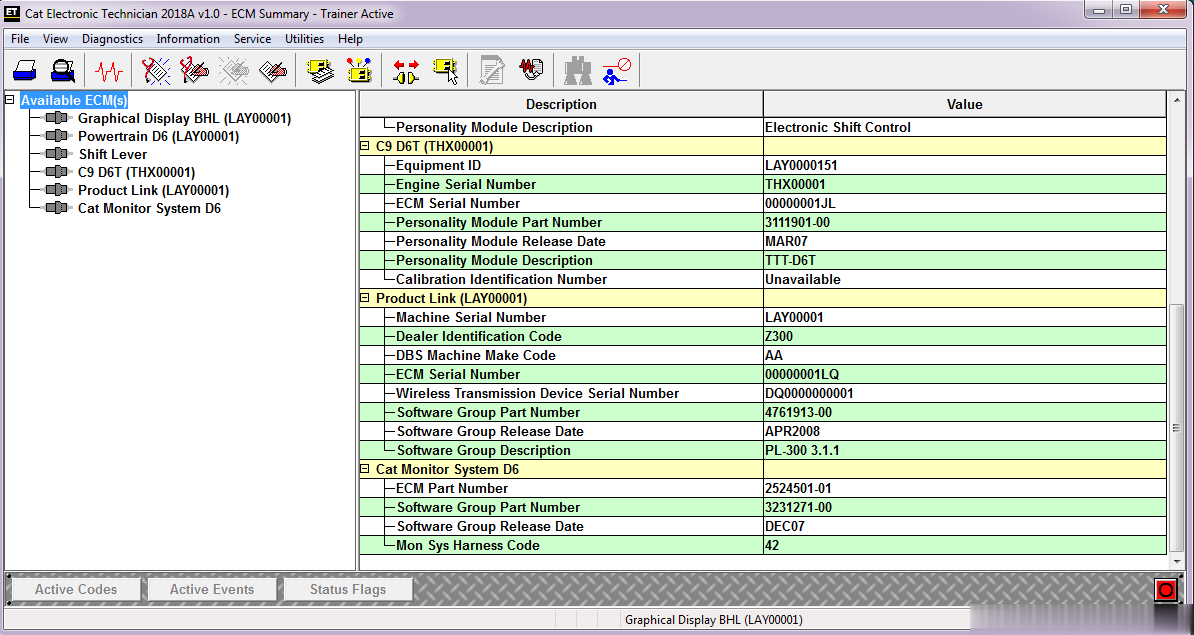
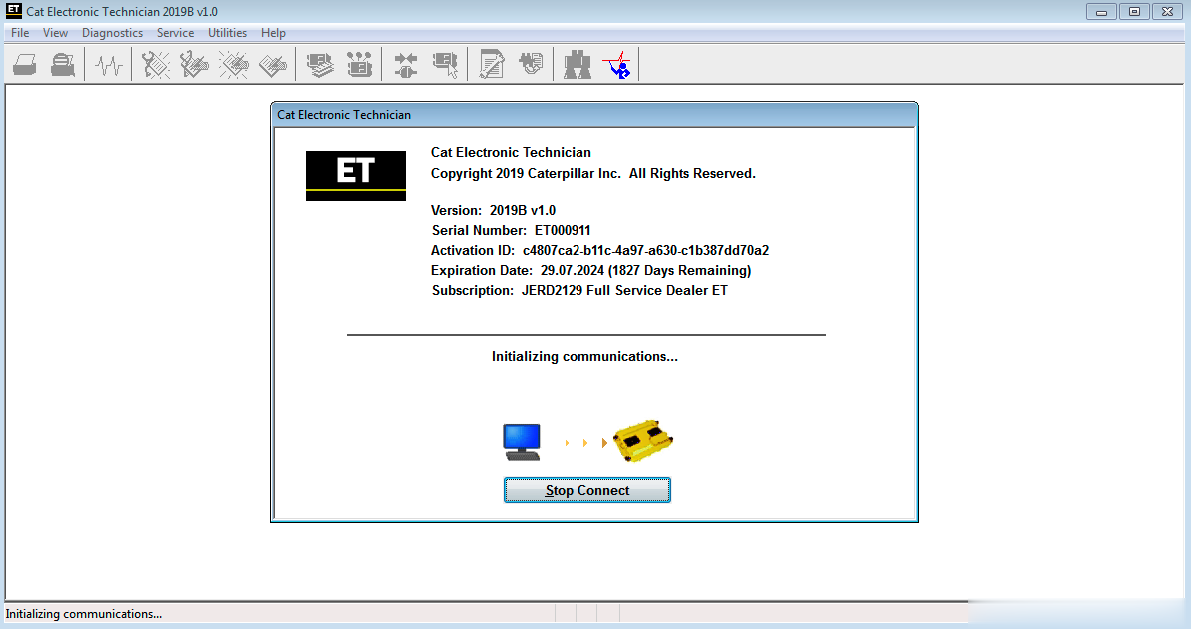
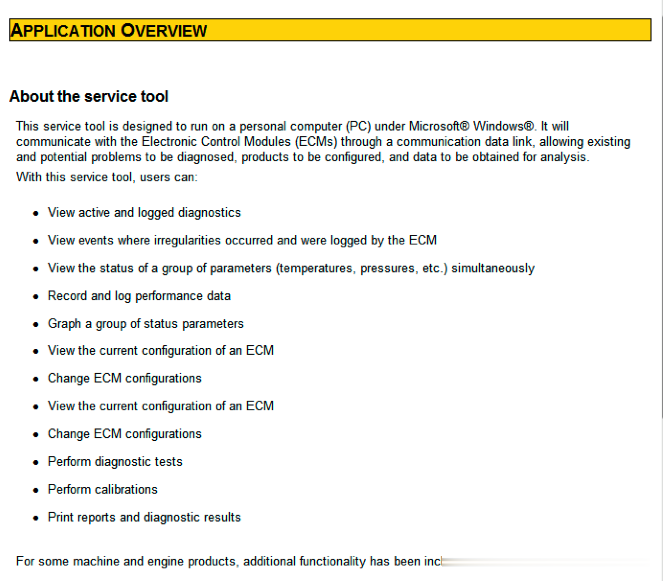
Screenshots for Caterpillar ET 2020B (replaces CAT ET 2019C, 2018A) Electronic Technician Diagnostic Software:
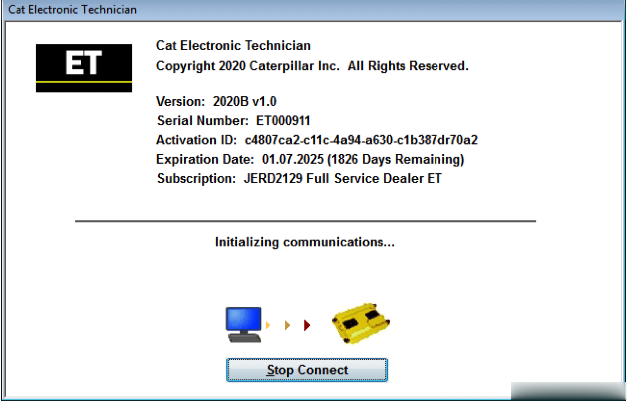
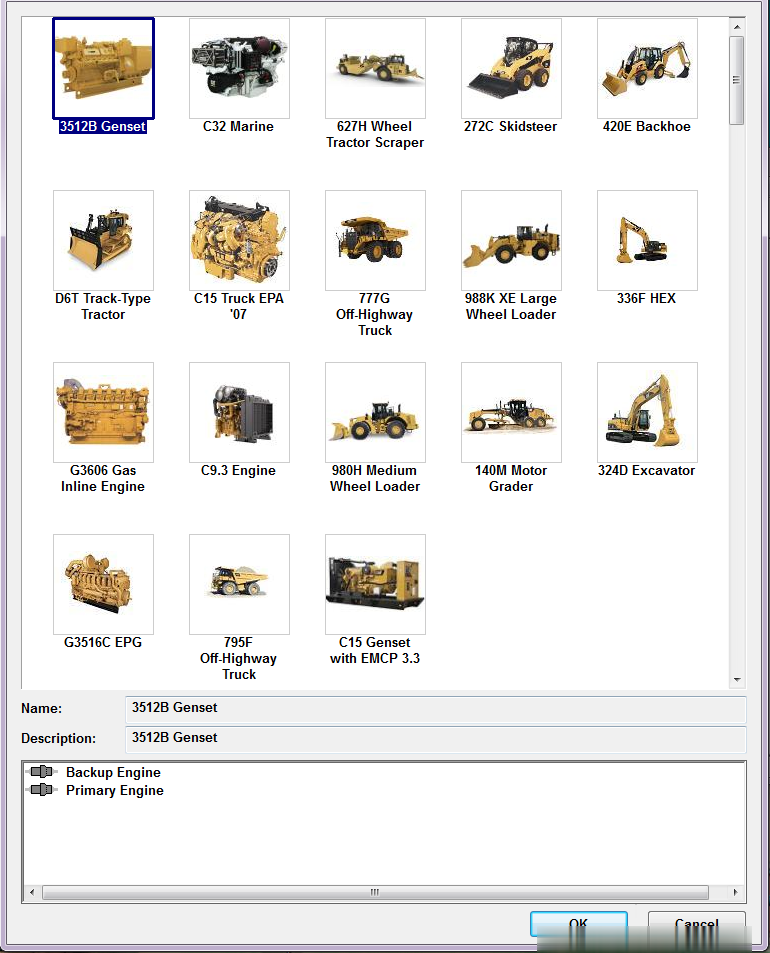
Caterpillar-ET-2020B-Electronic-Technician-Diagnostic-Software-1 (2) Caterpillar-ET-2020B-Electronic-Technician-Diagnostic-Software-2 (2)Caterpillar-ET-2020B-Electronic-Technician-Diagnostic-Software-3 (2)

Caterpillar-ET-2020B-Electronic-Technician-Diagnostic-Software-4 (2)Caterpillar-ET-2020B-Electronic-Technician-Diagnostic-Software-5 (2)Caterpillar-ET-2020B-Electronic-Technician-Diagnostic-Software-6 (2)


:: برچسب‌ها: Caterpillar ET ,
:: بازدید از این مطلب : 499
|
امتیاز مطلب : 0
|
تعداد امتیازدهندگان : 0
|
مجموع امتیاز : 0
تاریخ انتشار : سه شنبه 21 مرداد 1399 | نظرات ()
نوشته شده توسط : lily

How-to: program remote key for Renault Sendero 2018 using Autel MaxiIM IM608 via OBD.

Network connection is required.
Select IMMO->Renault->Manual Selection-> Dacia Logan->2016 up->Keyless System (CAN)->Key learning-> Learn the key

autel-im608-2018-renault-sendero-1 (2)

autel-im608-2018-renault-sendero-2 (2)

autel-im608-2018-renault-sendero-3 (2)

autel-im608-2018-renault-sendero-4 (2)

autel-im608-2018-renault-sendero-5 (2)

autel-im608-2018-renault-sendero-6 (2)
Switch hazards ON and ignition OFF
Password reading in progress

autel-im608-2018-renault-sendero-7 (2)
Checking flash data

autel-im608-2018-renault-sendero-8 (2)
Insert key. Switch ignition on. Max 4 keys allowed.

autel-im608-2018-renault-sendero-9 (2)
Program successfully.

autel-im608-2018-renault-sendero-10 (2)
Remove key, insert next key. Switch ignition ON

autel-im608-2018-renault-sendero-11 (2)
Program 2nd remote successfully.
Remove card and disconnect the Autel Scanner IM608.Insert card, start engine to complete procedure.

Done.


:: بازدید از این مطلب : 337
|
امتیاز مطلب : 0
|
تعداد امتیازدهندگان : 0
|
مجموع امتیاز : 0
تاریخ انتشار : چهار شنبه 15 مرداد 1399 | نظرات ()
نوشته شده توسط : lily

This article show a OBDSTAR X300 DP Plus test case on Fiat Delphi 93C66 PIN code reading.If you want to get more test case,check here:OBDSTAR X300 DP Plus test cases.

Procedures:

Connect OBDSTAR X300 DP Plus to Fiat,then enter the menu to select “FIAT V32.00”

OBDSTAR-X300-DP-Plus-Read-PIN-Code-for-Fiat-Delphi-93c66-1 (2)

After waiting a moment for system build connection and configuration

Tap “Pre-Coding”

OBDSTAR-X300-DP-Plus-Read-PIN-Code-for-Fiat-Delphi-93c66-2 (2)

Select “DELPHI 93C66(B)(ID48)”

OBDSTAR-X300-DP-Plus-Read-PIN-Code-for-Fiat-Delphi-93c66-3 (2)

Vehicle equipped with this unit:

Albea,Doblo(2000-2010),Punto,Palio,Strada

Tap “Yes” to continue

OBDSTAR-X300-DP-Plus-Read-PIN-Code-for-Fiat-Delphi-93c66-4 (2)

OBDSTAR X300 PAD2 will give the massage:

This function is available by connecting the server,please ensure the internet connection is normal

Tap “Enter” to continue

OBDSTAR-X300-DP-Plus-Read-PIN-Code-for-Fiat-Delphi-93c66-5 (2)

After then you need to select “Read EEPROM(93C66)”,the tap “Enter” to continue

OBDSTAR-X300-DP-Plus-Read-PIN-Code-for-Fiat-Delphi-93c66-6 (2)

Follow the screen prompt to switch ignition on

OBDSTAR-X300-DP-Plus-Read-PIN-Code-for-Fiat-Delphi-93c66-7 (2)

Switch ignition off

OBDSTAR-X300-DP-Plus-Read-PIN-Code-for-Fiat-Delphi-93c66-8 (2)

Then switch the ignition on again

Logging,please wait about 5 minutes…

OBDSTAR-X300-DP-Plus-Read-PIN-Code-for-Fiat-Delphi-93c66-9 (2)

Please enter a filename to save

OBDSTAR-X300-DP-Plus-Read-PIN-Code-for-Fiat-Delphi-93c66-10 (2)

OBDSTAR-X300-DP-Plus-Read-PIN-Code-for-Fiat-Delphi-93c66-11 (2)

Now you can get the PIN code

OBDSTAR-X300-DP-Plus-Read-PIN-Code-for-Fiat-Delphi-93c66-12 (2)

Done!


:: برچسب‌ها: OBDSTAR X300 DP PLUS PAD2, ,
:: بازدید از این مطلب : 380
|
امتیاز مطلب : 0
|
تعداد امتیازدهندگان : 0
|
مجموع امتیاز : 0
تاریخ انتشار : چهار شنبه 15 مرداد 1399 | نظرات ()
نوشته شده توسط : lily

Which tool can add smart key to Toyota when all keys lost?

The suggestion is that Xtool X100 Pad3 (X100 PAD Elite), Autel IM608 and Autel IM508 are good choices.

Method 1: XTOOL X100 PAD3 + KC100 adapter+ XTOOL KS-1 Toyota smart card
Method 2: Autel IM508+ APB112 key simulator
Method 3: Autel IM608+ XP400Autel APB112 Smart Key Simulator

In detail…
Method 1: XTOOL X100 PAD3 + KC100 adapter+ XTOOL KS-1 Toyota smart card

xtool-x100-pad3-autel-im508-608-toyota-akl-1 (2)

Two steps to add smart key (AKL):
Step 1: Backup IMMO data
Connect X100 PAD3 device with vehicle
Select Diagnosis-> Immobilization-> Toyota->All smart key lost-> Read immobilizer data

xtool-x100-pad3-autel-im508-608-toyota-akl-2 (2)
xtool-x100-pad3-autel-im508-608-toyota-akl-3 (2)

Follow the prompt to press the start button once
Read IMMO data and save it

xtool-x100-pad3-autel-im508-608-toyota-akl-4 (2)
xtool-x100-pad3-autel-im508-608-toyota-akl-5 (2)

Step 2: Generate emulator key
Enter Generate emulator key menu
Make sure connect the network to the device
Select the backup immobilizer file
Note: if there is no backup, please operate the “Backup immobilizer data” first
Select the corresponding file and identify key type
Connect the KC100 adapter with X100 PAD3 tablet
Activate KC100 automatically
Input KS-01 emulator smart card into KC100
xtool-x100-pad3-autel-im508-608-toyota-akl-6 (2)
xtool-x100-pad3-autel-im508-608-toyota-akl-7 (2)

Generate emulator successfully

xtool-x100-pad3-autel-im508-608-toyota-akl-8 (2)

Then you can follow the instructions to add new key
Method 2: Autel IM508+ XP200+ APB112 key simulator

xtool-x100-pad3-autel-im508-608-toyota-akl-9 (2)
xtool-x100-pad3-autel-im508-608-toyota-akl-10 (2)
Method 3: Autel IM608+ XP400+ APB112 key simulator

xtool-x100-pad3-autel-im508-608-toyota-akl-11 (2)

The guide to add Toyota smart key by IM508 is same as IM608.

Step 1: Back up Immobilizer data
Connect Autel IM508/IM608 key programmer with APB122 and vehicle

Select IMMO-> Toyota-> Manual Selection-> the corresponding car model-> Smart key-> Keyless system (CAN)-> Back up Immobilizer data

xtool-x100-pad3-autel-im508-608-toyota-akl-12 (2)
xtool-x100-pad3-autel-im508-608-toyota-akl-13 (2)

Pay attention to the prompt and then read IMMO data and save

xtool-x100-pad3-autel-im508-608-toyota-akl-15 (2)
xtool-x100-pad3-autel-im508-608-toyota-akl-16 (2)
Step 2: Generate simulator key
Select the EEPROM data and follow the instruction to generate key
xtool-x100-pad3-autel-im508-608-toyota-akl-17 (2)

Step 3: Add smart key
Put the simulator key APB112 close to the START button

xtool-x100-pad3-autel-im508-608-toyota-akl-18 (2)

Then put the smart key to learned close to the START button

xtool-x100-pad3-autel-im508-608-toyota-akl-19 (2)
Finally, learn the new key successfully

xtool-x100-pad3-autel-im508-608-toyota-akl-20 (2)

XTOOL X100 PAD3 Highlight:
1.Support key mismatch after loss
2.For Toyota/Lexus key lost
3.For VW 4/5th anti theft
4.Key increase matched
5.Support Multi-Language: English, Spanish, French, Russian, German, Polish, Portuguese, Turkish, Arabic
6.Update Via WIFI (always equip your device with the latest software)
7.Support 16 Special Functions
Service/Maintenance Light
Steering Angle Sensor Adjustment
Window Initialization
Throttle Relearn
PDF
BMS Reset
Seat Match
Electric Parking Brake
Cylinder
Airbag Repair
Air Suspension
Injector Coding
EEPROM Adapter
Headlight
Tire Pressure Reset
Gearbox Match

XTOOL X100 PAD3 TOYOTA all keys lost car list:
1.X100 PAD3 with XTOOL KS-1 simulator support Toyota 94 / D4, 98, 39, 88 / A8, A9 type smart key all-key-lost matching. Also support generation, copy and simulation of key chip.

2.The simulation card can be reused. After matching the key, turn off the power or remove the battery to restore the initial state.

3.XTOOL KS-1 TOYOTA SMART KEY SIMULATOR The key type has been tested:

No.    vehicle    Year    Key type    Support or not     Remarks
1    RAV4    2015    88    Yes
2    Alphard    2013    94    Yes
3    Alphard    2015    A9    Yes
4    Previa    2008    94    Yes
5    Crown    2010    98    Yes
6    Crown    2015    A8    Yes
7    Crown    2016    A8    No    After 2016, Toyota crown is not supported
TANGO, K518 even rival products are not
supported
8    Prado    2011    98    Yes
9    Previa    2013    94    Yes
10    Reiz    2011    98    Yes
11    Innova        39    Yes    The car is being tested for the Indian Tango

Autel IM608/IM508 Highlight:
1.Diagnosis Language: Default Language is English, Free to change French, German, Dutch, Polish, Swedish, Korean, Japanese, Russian, Italian, Traditional Chinese(Provide your device S/N to change language)
IMMO Language: English
2.Free Update Online for 1 Year
3.Warranty for 12 Months.
4.ADVANCED IMMO & KEY PROGRAMMING
5.OE-Level Diagnostic and Service Functions
6.Professional key programming equipped with XP400 key programmer and MaxiFlash ECU programmer for complete Immo coverage.
7.Ship from UK with Fast Delivery. No Import Duty Problem
8.NO IP Blocking Problem, Can Be Used in All EU Countries


:: برچسب‌ها: XTOOL X100 PAD3 ,Autel IM608 IM508, ,
:: بازدید از این مطلب : 322
|
امتیاز مطلب : 2
|
تعداد امتیازدهندگان : 1
|
مجموع امتیاز : 1
تاریخ انتشار : پنج شنبه 12 تير 1399 | نظرات ()
نوشته شده توسط : lily

How to program remote keys for KIA Forte 2011 with OBDSTAR X300 DP PLUS? The job can be done just in minutes. Let’s see what we need to do.

Step 1:
Open Mobile Keydiy (KD) app installed on your phone and run it to generate a remote (Make sure the Bluetooth in your phone is on).
obdstar-x300-dp-plus-programs-remotes-for-kia-forte-01 (2)

obdstar-x300-dp-plus-programs-remotes-for-kia-forte-05 (2)

obdstar-x300-dp-plus-programs-remotes-for-kia-forte-06 (2)

obdstar-x300-dp-plus-programs-remotes-for-kia-forte-07 (2)

Step 2:
Press DP on the device screen.
obdstar-x300-dp-plus-programs-remotes-for-kia-forte-08 (2)

Step 3:
Select Diag Program -> MMOBILISER -> KIA.
obdstar-x300-dp-plus-programs-remotes-for-kia-forte-09 (2)

obdstar-x300-dp-plus-programs-remotes-for-kia-forte-10 (2)

Step 4:
Choose your car’s version, then wait a few seconds.
obdstar-x300-dp-plus-programs-remotes-for-kia-forte-11 (2)

Step 5:
You’ll go to an interface as below. Choose Select From Type -> Remote -> 16 PIN -> Type1 -> Program Remotes, then wait it communicating.
obdstar-x300-dp-plus-programs-remotes-for-kia-forte-12 (2)

obdstar-x300-dp-plus-programs-remotes-for-kia-forte-13 (2)

Step 6:
Insert the key to switch the ignition on. After that, immediately switch the ignition off and remove the key. Press Enter to continue.
obdstar-x300-dp-plus-programs-remotes-for-kia-forte-14 (2)

obdstar-x300-dp-plus-programs-remotes-for-kia-forte-15 (2)

Step 7:
Press the Lock/Unlock button on the key for more than 1 second.
obdstar-x300-dp-plus-programs-remotes-for-kia-forte-16 (2)

Step 8:
Program succeed! Press Enter to continue if you want to program one more remote.
obdstar-x300-dp-plus-programs-remotes-for-kia-forte-17 (2)

Step 9:
Repeat step 7 with another key and all is done!
obdstar-x300-dp-plus-programs-remotes-for-kia-forte-18 (2)


:: برچسب‌ها: OBDSTAR X300 DP PLUS PAD2, ,
:: بازدید از این مطلب : 373
|
امتیاز مطلب : 7
|
تعداد امتیازدهندگان : 2
|
مجموع امتیاز : 2
تاریخ انتشار : پنج شنبه 12 تير 1399 | نظرات ()
نوشته شده توسط : lily


OBDSTAR X300M is specially developed for odometer adjustment, which makes it devoted and professional. There’re some things you need to keep in mind while working on Peugeot/Citroen cars with X300 odometer correction tool.

Notice:
1. During the mileage adjustment process, ensure the power is sufficient and the voltage is stable.

2. Before performing the adjustment function, you must read and save the instrument and BSI data (EEPROM and FLASH) first.

3. For the mileage adjustment, it needs to adjust the instrument and BSI module at the same time. If one of them is adjusted first, it will be synchronized by the data of another module and restored to the original mileage. The solution is as follows:

Option 1): First remove the adjustment (do not pull the plug), and then adjust the instrument mileage through OBD. After the adjustment is successful, immediately unplug the instrument (as fast as possible), and then adjust the BSI mileage through OBD. The value is consistent with the instrument. After that, enter the reading mileage, confirm the mileage to be adjusted, and then install the instrument;
obdstar-x300m-odometer-adjustment-notice-01 (2)

Option 2): First adjust the instrument mileage through OBD. After the adjustment is successful, immediately unplug the instrument power supply fuse (as fast as possible, it is recommended to unplug the fuse before adjusting the instrument to check whether the instrument is powered off), and then adjust the BSI mileage through OBD. The value is consistent with the instrument. After that, enter the reading mileage, confirm the mileage to be adjusted, and then install the instrument fuse.

The instrument fuse is on the BSI, and the BSI position is generally below the steering wheel, as shown below.
obdstar-x300m-odometer-adjustment-notice-02 (2)

Note: The position of the fuses may vary depending on years and models. According to the BSI module brand type, Valeo is generally F21, Continent is generally F19, and JHNSON CONTRLS is generally F12…;

obdstar-x300m-odometer-adjustment-notice-03 (2)

4. BSI menu is based on types, such as “CONTINENTAL BSI-Q0X”, where CONTINENTAL is the BSI brand name. Q0X is the BSI type, X stands for any number 0-9, and the device can automatically recognize. If not, the types are not supported. Types can be seen on the BSI module label, as shown below.
obdstar-x300m-odometer-adjustment-notice-04 (2)

obdstar-x300m-odometer-adjustment-notice-05 (2)

OBDSTAR X300M PSA Car List:
Citroen
BSI:
Auto Select & Manual Select
CONTINENTAL BSI-Q0X JC
BSI04EV-K0X
JC BSI2004-H0X
SIEMENS BSI-E0X/BSI-F0X VALEO BSI-N0X
VALEO BSI2004-P0X

DASH:
C3, 2009
C4, 2010- C4L
C4, Cactus Mono 2014-
C4, Picasso TFT 2014-
C4, Picasso Mono, 2014-
C5, 2008
DS3, Mileage adjustment, Read EEPROM (Backup), Write EEPROM (Restore)
DS4, DS5, Mileage adjustment, Read EEPROM (Backup), Write EEPROM (Restore)
Jumper 2015

PEUGEOT:
BOXER 2015


:: برچسب‌ها: OBDSTAR X300M ,
:: بازدید از این مطلب : 657
|
امتیاز مطلب : 2
|
تعداد امتیازدهندگان : 1
|
مجموع امتیاز : 1
تاریخ انتشار : چهار شنبه 28 خرداد 1399 | نظرات ()
نوشته شده توسط : lily

I have used EZ-diag for a log time, and today i suddely could not log in. First, the message “The account has been loged in from another device”. I have got new password twice, but can still not log in.


After contact with www.obd2tool.com , I had got the program to work with android 10. I was able to get LAUNCH ICARSCAN working again.  I am very appreciative.


Today I would like to share the program to other customers.


You can check this link to download : LAUNCH ICARSCAN android 10 app


OBD2TOOL company are really 5*+ and customer support is allways super fast and good… we will come back 100% for more business !! Stay like that this is the future if customers happy its the importend thing in buisenes life!!


:: بازدید از این مطلب : 377
|
امتیاز مطلب : 4
|
تعداد امتیازدهندگان : 1
|
مجموع امتیاز : 1
تاریخ انتشار : سه شنبه 13 خرداد 1399 | نظرات ()
نوشته شده توسط : lily

This instruction show you guide on how to use launch scan tool x431 master to program brake pad replacement for Audi A7 2012. For more Audi repair,please check here:Audi trouble repair.

Prerequisites:

The battery voltage is no less than 12V.

Ignition ON and engine stopped.

Parking brake switch pressed and instrument panel brake lamp off before basic setting

Procedures:

1) Turn on the ignition switch.

2) Choose brake pad reset V10.40 or a later version.

3) Choose AUDI.

Launch-X431-Audi-A7-2012-Brake-PAD-Replacement-Programming-1

4) Choose Other Vehicle Models.

Launch-X431-Audi-A7-2012-Brake-PAD-Replacement-Programming-2
5) Choose 53 Parking Brake.

Launch-X431-Audi-A7-2012-Brake-PAD-Replacement-Programming-3

6) Note the brake pad replacement conditions.

Launch-X431-Audi-A7-2012-Brake-PAD-Replacement-Programming-4

7) Click OK. The brake pad replacement function menu is displayed. You can choose the brake pad replacement function as required. Choose Auto Rear Brake Pads Replacement.

Launch-X431-Audi-A7-2012-Brake-PAD-Replacement-Programming-5

8) The “Read Fault Codes” menu is displayed.

Launch-X431-Audi-A7-2012-Brake-PAD-Replacement-Programming-6

9) Choose Read Fault Codes.

Launch-X431-Audi-A7-2012-Brake-PAD-Replacement-Programming-7

10) Click OK. The “Clear Fault Codes” menu is displayed.

Launch-X431-Audi-A7-2012-Brake-PAD-Replacement-Programming-8

11) Choose Clear Fault Codes.

Launch-X431-Audi-A7-2012-Brake-PAD-Replacement-Programming-9

12) If the fault codes have been cleared, click No.

Launch-X431-Audi-A7-2012-Brake-PAD-Replacement-Programming-10

13) Choose Open Rear Brake Calipers.

Launch-X431-Audi-A7-2012-Brake-PAD-Replacement-Programming-11

14) Wait for about 30s. The brake calipers have been opened.

Launch-X431-Audi-A7-2012-Brake-PAD-Replacement-Programming-12

15) Click OK to replace the brake pads. See Figure 14. When replacing the brake pads, if the motor is not completely separated, manual “open-top” is required.

Launch-X431-Audi-A7-2012-Brake-PAD-Replacement-Programming-13

16) After the brake pads are replaced, click OK. The “Close Rear Brake Calipers” menu is displayed.

Launch-X431-Audi-A7-2012-Brake-PAD-Replacement-Programming-14

17) Choose “Close Rear Brake Calipers”. The conditions for closing rear brake calipers are displayed.

Launch-X431-Audi-A7-2012-Brake-PAD-Replacement-Programming-15

18) If the conditions are met, click OK.

Launch-X431-Audi-A7-2012-Brake-PAD-Replacement-Programming-16

19) Wait for about 30s. The brake calipers have been closed.

Launch-X431-Audi-A7-2012-Brake-PAD-Replacement-Programming-17

20) Click OK. Brake pad replacement is completed.

Launch-X431-Audi-A7-2012-Brake-PAD-Replacement-Programming-18


:: بازدید از این مطلب : 372
|
امتیاز مطلب : 3
|
تعداد امتیازدهندگان : 1
|
مجموع امتیاز : 1
تاریخ انتشار : سه شنبه 16 ارديبهشت 1399 | نظرات ()